Easter Pudding Dirt Cups are one of the most fun, creative, and crowd-pleasing desserts you can make during the spring season. These adorable, individual desserts combine layers of creamy pudding, crushed chocolate cookies, and festive toppings to create a treat that looks like “dirt” but tastes absolutely delicious. Because they are colorful, customizable, and require no baking, Easter Pudding Dirt Cups are perfect for Easter parties, school events, and family gatherings.
What makes Easter Pudding Dirt Cups so appealing is their balance of simplicity and creativity. On one hand, they are incredibly easy to prepare using basic ingredients. On the other hand, they offer endless decorating possibilities, allowing you to create unique and eye-catching designs. From gummy worms to pastel candy eggs and edible grass, you can tailor each cup to match your Easter theme.
In this complete guide, you will learn everything about making Easter Pudding Dirt Cups, including ingredients, step-by-step instructions, layering techniques, decorating ideas, expert tips, variations, storage methods, and frequently asked questions. By the end, you will be able to create a dessert that is both visually stunning and irresistibly tasty.
JUMP TO
Table of Contents
What Are Easter Pudding Dirt Cups
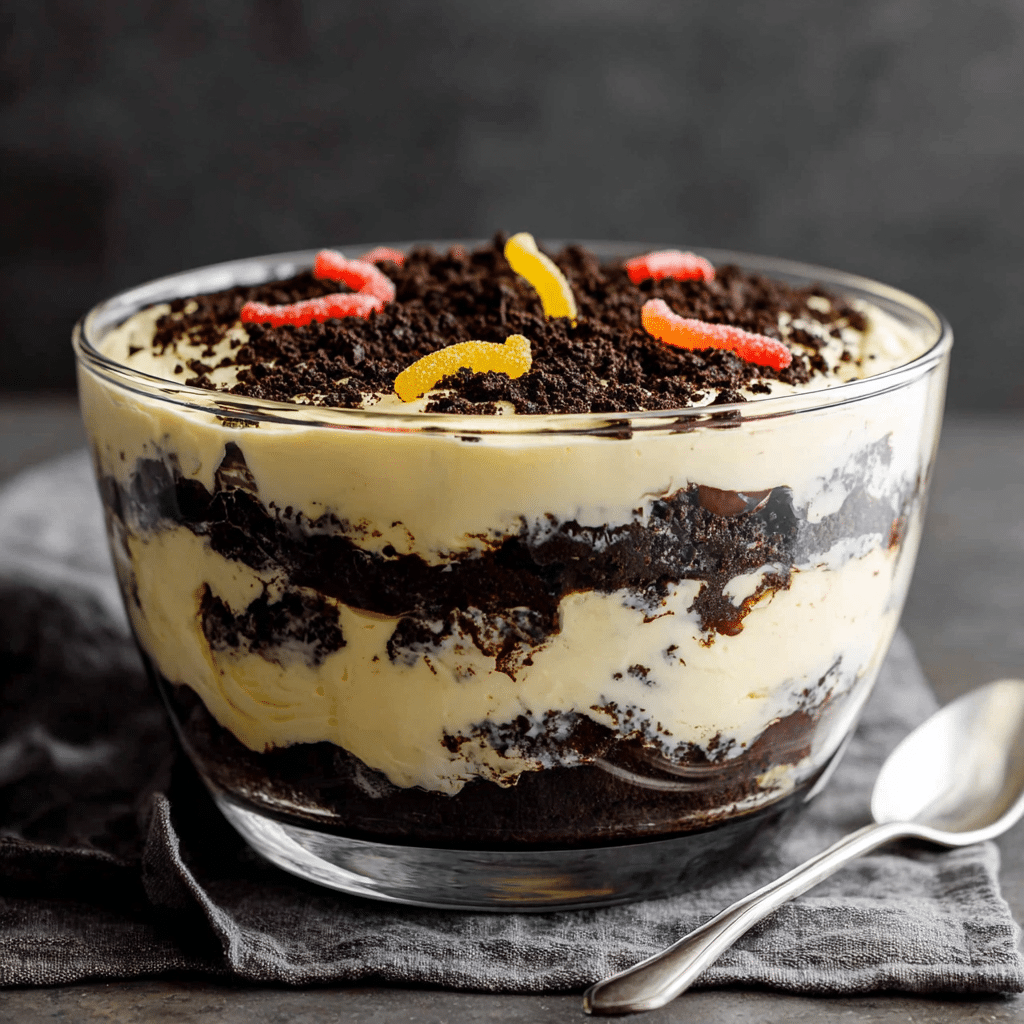
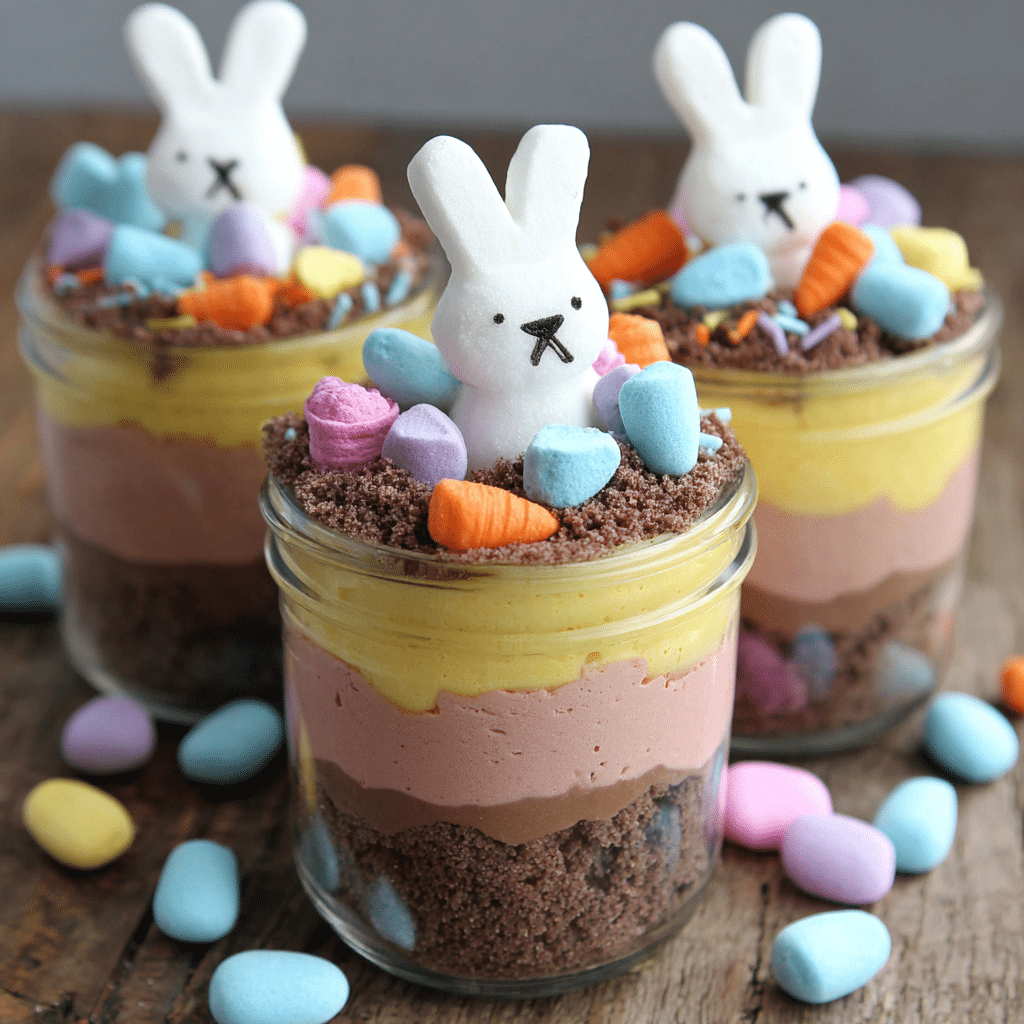
Easter Pudding Dirt Cups are individual dessert cups made by layering chocolate pudding with crushed cookies, usually chocolate sandwich cookies, to create a “dirt-like” appearance. These layers are then topped with festive decorations such as gummy worms, candy eggs, sprinkles, or whipped cream.
Unlike traditional baked desserts, these dirt cups are completely no-bake. This makes them quick to prepare and ideal for beginners or busy schedules. The combination of creamy pudding and crunchy cookie crumbs creates a satisfying contrast in texture, while the toppings add both flavor and visual appeal.
Because they are served in individual cups, they are easy to portion, transport, and serve, making them a popular choice for parties and events.
Why Easter Pudding Dirt Cups Are Perfect for Easter
Easter is a celebration of color, creativity, and joy, and Easter Pudding Dirt Cups capture all of these elements perfectly. Their layered design and playful decorations make them visually appealing, while their rich and creamy flavor ensures they are a hit with everyone.
These dirt cups are also highly practical. Since they are pre-portioned, they eliminate the need for cutting and serving, which makes hosting easier. In addition, they can be made ahead of time, saving valuable preparation time on the day of your event.
Another reason they are so popular is their kid-friendly nature. Children love the idea of eating “dirt” with candy decorations, and they can even help assemble the cups, turning the process into a fun activity.
Ingredients for Easter Pudding Dirt Cups
Using simple, accessible ingredients makes this dessert easy to prepare while still delivering great flavor.
Core Ingredients

| Ingredient | Quantity | Purpose |
|---|---|---|
| Chocolate sandwich cookies | 1 package | “Dirt” layer |
| Instant chocolate pudding mix | 1 package | Creamy base |
| Milk | 2 cups | Smooth texture |
| Whipped topping | 8 oz | Lightness |
Decoration Ingredients
- Gummy worms
- Candy eggs
- Sprinkles
- Crushed cookies
Optional Add-ins
- Cream cheese
- Peanut butter
- Vanilla extract
Step-by-Step Guide to Making Easter Pudding Dirt Cups
Start by crushing the chocolate sandwich cookies into fine crumbs. You can use a food processor or crush them manually in a sealed bag. Set aside.
Prepare the pudding by mixing it with milk according to the package instructions. Stir until it thickens properly.
Fold in the whipped topping gently to create a light and fluffy mixture. This step is important for achieving the right texture.
Begin assembling the cups by adding a layer of crushed cookies at the bottom. Add a layer of pudding mixture on top. Continue layering until the cups are filled, finishing with a layer of crushed cookies.
Decorate each cup with gummy worms, candy eggs, or sprinkles. Place the cups in the refrigerator and chill for at least one to two hours before serving.
Layering Techniques for Perfect Dirt Cups
Layering is essential for creating visually appealing Easter Pudding Dirt Cups. Each layer should be even and well-defined.
Start with a base layer of cookie crumbs to create structure. Follow with a generous layer of pudding, spreading it evenly. Repeat the layers until the cup is full.
Using clear cups can enhance the presentation by showcasing the layers, making the dessert look more professional.
Creative Decorating Ideas
Decorating Easter Pudding Dirt Cups is where you can truly get creative. You can add gummy worms partially buried in the “dirt” for a playful effect.
For an Easter theme, use pastel candy eggs or bunny-shaped decorations.
Another idea is to add green-colored coconut flakes to resemble grass, creating a mini garden look.
You can also use whipped cream to create decorative swirls on top.
Expert Tips for Perfect Easter Pudding Dirt Cups
Use cold milk when preparing the pudding to help it set properly.
Crush cookies finely for a realistic dirt texture.
Chill the cups for at least one hour to allow the layers to firm up.
Fold whipped topping gently to maintain a light texture.
Taste the pudding mixture before assembling to adjust sweetness if needed.
Common Mistakes to Avoid
Adding too much liquid can make the pudding runny.
Skipping the chilling step can result in a messy dessert.
Using uneven layers can affect both appearance and taste.
Overmixing the whipped topping can reduce its fluffiness.
Variations of Easter Pudding Dirt Cups
You can experiment with different pudding flavors such as vanilla, cookies and cream, or even banana.
Adding cream cheese creates a richer and thicker filling.
For a lighter version, use low-fat milk and reduced-sugar pudding.
You can also create a fruit version by adding layers of berries or banana slices.
Serving Suggestions
Serve Easter Pudding Dirt Cups chilled for the best flavor and texture.
Arrange them on a decorative tray for a festive display.
Pair them with other desserts such as cupcakes, cookies, or fruit trays.
For parties, serve them in individual cups for easy handling.
Storage and Make Ahead Tips
Store the cups in the refrigerator for up to three days.
Cover them with lids or plastic wrap to maintain freshness.
Prepare them a day in advance to save time and enhance flavor.
Avoid freezing, as it can affect the texture of the pudding.
Frequently Asked Questions
What are Easter Pudding Dirt Cups made of
They are made with pudding, crushed cookies, whipped topping, and festive decorations.
They are made with pudding, crushed cookies, whipped topping, and festive decorations.
No, they are completely no-bake.
How long should they chill
At least one to two hours.
Can you make them ahead of time
Yes, they can be prepared a day in advance.
Conclusion
Easter Pudding Dirt Cups are a perfect combination of fun, flavor, and simplicity. Because they are easy to make and highly customizable, they are ideal for Easter celebrations and beyond. Their creamy layers, crunchy cookie crumbs, and playful decorations make them a dessert that stands out on any table.
What truly makes Easter Pudding Dirt Cups special is their versatility. You can experiment with flavors, decorations, and presentation styles to match any theme or preference. At the same time, they are beginner-friendly, making them accessible to anyone who wants to create a festive dessert without spending hours in the kitchen.
By following this complete guide, you can confidently create Easter Pudding Dirt Cups that look amazing and taste delicious. Whether you are making them for a party, a family gathering, or simply for fun, these delightful cups are guaranteed to bring smiles and become a favorite treat during the Easter season.
PrintEaster Pudding Dirt Cups: Easy & Fun No-Bake Dessert

Easter Pudding Dirt Cups are fun, no-bake desserts made with creamy pudding, crushed cookies, and festive toppings like gummy worms and candy eggs.
- Prep Time: 20 minutes
- Cook Time: 0 minutes
- Total Time: 2 hours 20 minutes
- Yield: 8 cups 1x
Ingredients
- 1 package chocolate sandwich cookies
- 1 package instant pudding mix
- 2 cups milk
- 8 oz whipped topping
- Gummy worms and candy eggs
Instructions
- Crush cookies into fine crumbs.
- Prepare pudding with milk.
- Fold in whipped topping.
- Layer cookies and pudding in cups.
- Top with crushed cookies.
- Decorate with candy.
- Chill for 1–2 hours before serving.
Notes
- Chill before serving for best texture.
- Use cold milk for pudding.
- Do not overmix.
- Store in refrigerator.
- Do not freeze.
Nutrition
- Serving Size: 1 cup
- Calories: 280
- Sugar: 24g
- Sodium: 210mg
- Fat: 12g
- Saturated Fat: 7g
- Unsaturated Fat: 4g
- Trans Fat: 0g
- Carbohydrates: 36g
- Fiber: 1g
- Protein: 4g
- Cholesterol: 25mg