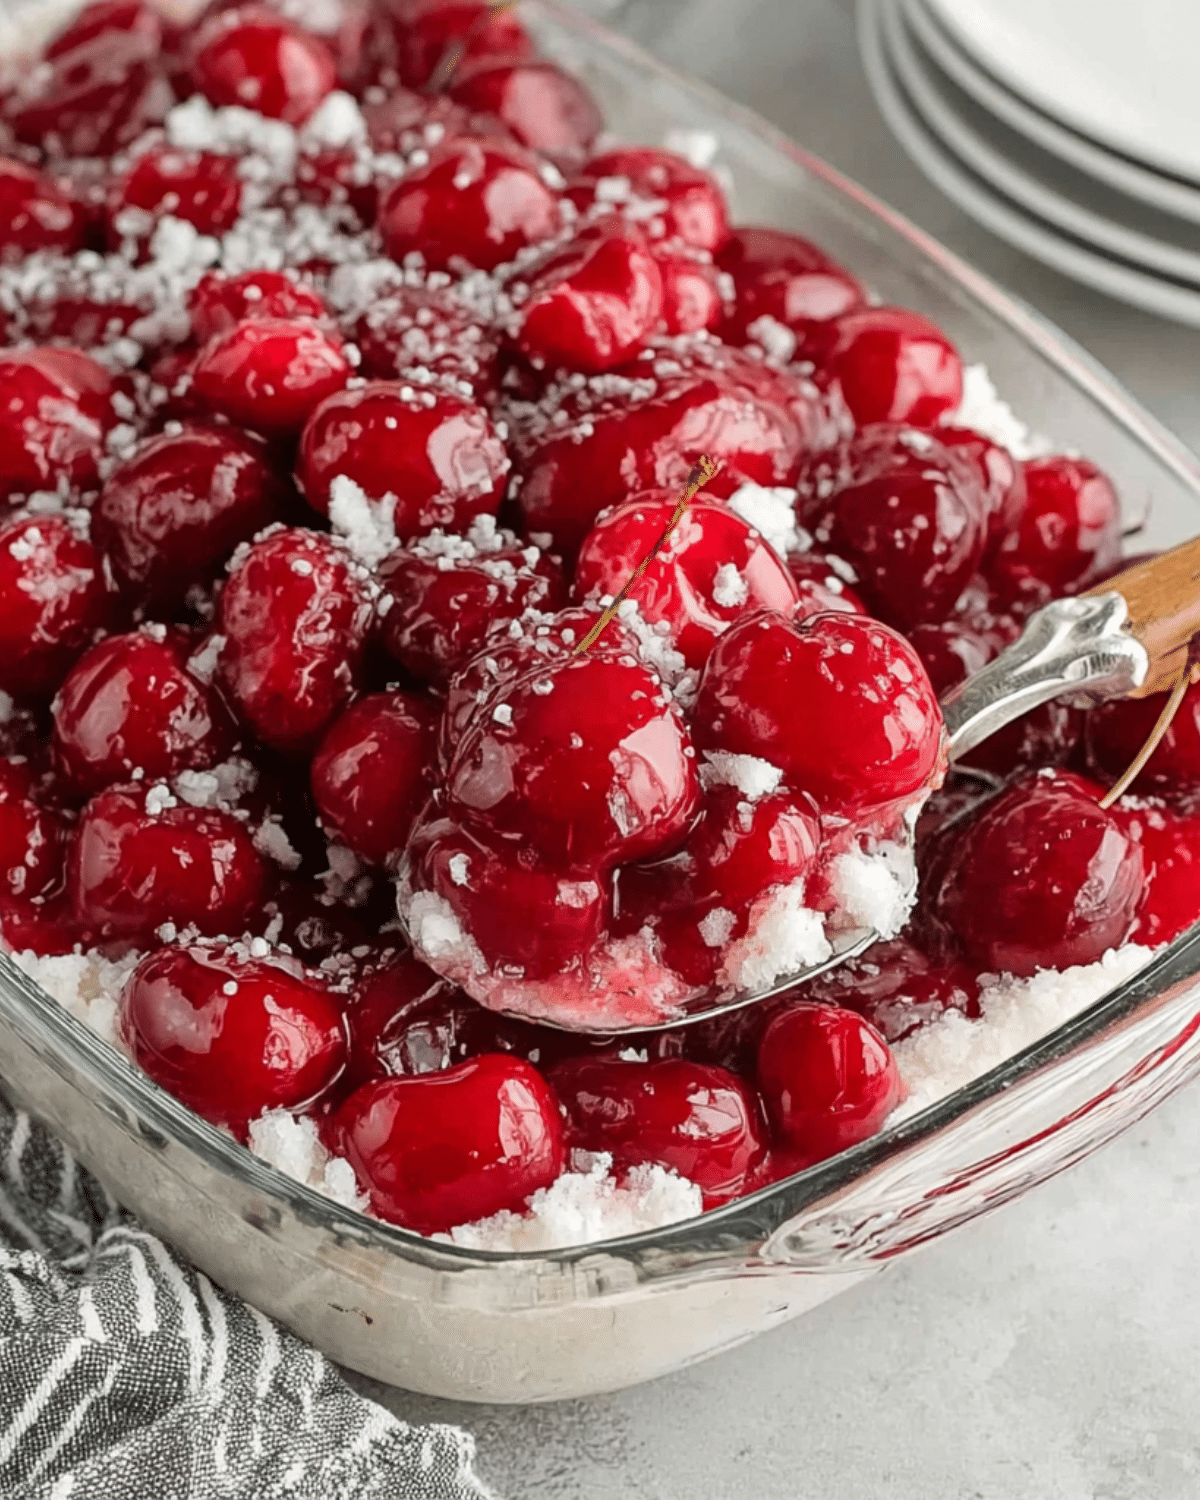
If you’re dreaming of a creamy, fruity dessert that’s as gorgeous as it is effortless, Cherries in the Snow is the answer. This vintage no-bake treat layers fluffy angel food cake with a sweetened cream cheese mixture and ruby-red cherry pie filling. It’s light, indulgent, and ridiculously simple to put together. Whether you’re hosting a holiday gathering or just want a quick dessert without turning on the oven, this recipe delivers all the wow with none of the fuss.
Looking for inspiration? Try our Mini Cherry Cheesecakes for another fruity, bite-sized treat that’s equally irresistible.
JUMP TO
Table of Contents
What is Cherries in the Snow?
A nostalgic dessert with modern ease
Cherries in the Snow is more than just a pretty name—it’s a dessert that’s stood the test of time. Dating back to mid-20th century American kitchens, this dish became a holiday staple thanks to its beautiful presentation and foolproof prep. With its white base and vibrant red topping, it brings a snowy, festive look to any table. Yet, what’s truly magical is how simple it is to prepare—no baking, no fancy equipment, and no stress.
Over the years, this no-bake cherry dessert has become a go-to for Christmas, Valentine’s Day, and summer cookouts alike. It’s one of those recipes passed down from grandma’s kitchen, but it feels just as relevant and crowd-pleasing today.
What makes it unique?
What separates Cherries in the Snow from other desserts is the balance of textures and flavors. You’ve got soft, airy cubes of angel food cake folded into a creamy, lightly sweetened layer of whipped topping and cream cheese. On top? A thick, luscious cherry pie filling that brings tartness and a beautiful pop of color.
The simplicity is deceptive—it looks like something you might find in a bakery display, yet it takes just 15 minutes to assemble. And thanks to its chill time in the fridge, the flavors meld together into something even better than the sum of its parts.
Don’t miss our Chocolate Cherry Brownies for a rich, baked option that highlights cherry goodness in a whole new way.
Essential Ingredients for Cherries in the Snow

Key components of the classic recipe
Every delicious bite of Cherries in the Snow starts with a few simple ingredients you probably already have—or can easily grab at any grocery store. Each plays a unique role in building this creamy, cloud-like dessert.
- Cream Cheese: Full-fat cream cheese delivers richness and structure to the base layer. Always let it soften to room temperature for a lump-free mix. Want a lighter version? Low-fat works too, but the texture might be less velvety.
- Powdered Sugar: This sweetens the cream cheese blend without any graininess. You can adjust the amount to taste, but ¾ cup is the golden ratio for balance.
- Milk: Whole milk helps loosen the mixture, making it easy to fold in the other ingredients. 2% works in a pinch, though you’ll lose a little creaminess.
- Vanilla Extract: This classic flavoring rounds out the tang of the cream cheese. For a twist, add a dash of almond extract—it pairs beautifully with cherries and gives a bakery-style finish.
- Whipped Topping: Cool Whip keeps this dessert fast and fuss-free. But if you’re team homemade, fresh whipped cream (whipped to soft peaks) works too. Just avoid overbeating.
- Angel Food Cake: This airy cake is the real backbone. It soaks in the cream mixture and creates that light texture. Use store-bought to save time or bake your own if you’re feeling ambitious. Either way, make sure it’s completely cool before cutting it into cubes.
- Cherry Pie Filling: The signature red topping! Go for a high-quality brand like Comstock that has big whole cherries. It makes a huge difference in both taste and appearance.
Don’t miss our Cranberry White Chocolate Cheesecake for another creamy holiday-inspired delight.
Ingredient swaps and customizations
One of the best things about Cherries in the Snow is how customizable it is. Whether you’re making it for a crowd, looking to add a twist, or simply using what’s in your pantry, there’s room to play.
- Swap the fruit: Not a cherry fan? Substitute with blueberry, strawberry, raspberry, or even peach pie filling. Mixed berry blends are also fantastic for a summer version.
- Change the cake: Angel food cake keeps things light, but pound cake or sponge cake creates a denser, more indulgent dessert. Just make sure to cut evenly sized cubes to keep the texture consistent.
- Low-sugar variation: Use light or sugar-free pie filling and reduced-fat cream cheese. You can also cut the powdered sugar by half if you’re after a less sweet dessert.
- Add crunch: Sprinkle crushed graham crackers, sliced almonds, or white chocolate shavings between the layers or on top for a little texture and flair.
- Festive flair: Want to make this for the holidays? Use mini dessert cups, add some sugared cranberries on top, or layer in a trifle dish for that “wow” factor.
Discover great ideas like our Banana Bread Cake with Cream Cheese Frosting if you’re craving another creamy and comforting dessert.
Pro Tip: If you’re short on time, prep everything the night before and just assemble the layers the next day. The flavors meld beautifully after chilling!
Check out our Orange Mousse Cups for a refreshing fruit-based dessert with a citrus twist.
How to Make Cherries in the Snow (Step-by-Step)
Creating this stunning no-bake dessert takes less time than brewing a pot of coffee, but the final result feels like something out of a bakery. Here’s exactly how to make Cherries in the Snow from scratch.
Preparing the cream cheese layer
Start with softened cream cheese in a large mixing bowl. Beat it with an electric mixer on medium-high speed until it’s fluffy and lump-free—about 1 to 2 minutes. Then, slowly mix in the powdered sugar, blending until smooth and creamy.
Next, add the milk and vanilla extract. Beat again, scraping down the sides as needed, until the entire mixture is light and smooth. This is the foundation of your dessert—creamy, slightly sweet, and perfect for folding.
Check out our Candied Cranberries Holiday Recipe for a tart topping that also works great on no-bake desserts.
Folding in whipped topping and cake
Once your cream cheese base is ready, gently fold in the Cool Whip or your homemade whipped cream. Use a rubber spatula and fold—not stir—to keep the mixture airy. It should be light and cloud-like.
Then, tear or cut the angel food cake into ¾–1 inch cubes. Add them to the bowl and fold gently until all pieces are coated in the creamy mixture. Take care not to mash the cake—you want to maintain that fluffy structure.
Layering the dessert
Transfer the mixture into a 9×13-inch baking dish. Spread it out evenly, smoothing the top with a spatula. Now, spoon the cherry pie filling over the top, making sure every bite gets that burst of cherry goodness.
Want to elevate the look? Layer everything in a trifle bowl or clear dessert cups to show off those pretty red and white layers. It’s perfect for parties and holiday spreads.
Refrigeration and serving tips
Once assembled, refrigerate the dish for at least 30 minutes, but ideally closer to 2 hours. This lets the flavors meld and helps the cream cheese layer set.
Serve chilled straight from the fridge. If it’s been out a while, a quick 10-minute chill brings the texture right back.
Storage: Keep leftovers covered in plastic wrap or in an airtight container. It stays fresh in the fridge for up to 2 days, though it’s best enjoyed within 24–36 hours to preserve the texture of the cake.
Make-ahead: You can prep this dessert up to a day in advance, making it an excellent option for stress-free hosting.
Don’t miss our Mini Cherry Cheesecakes for another quick and creamy make-ahead dessert.
Why Cherries in the Snow is the Ultimate Holiday Dessert
Perfect for Christmas, Valentine’s Day, and beyond
There’s something undeniably festive about the red and white contrast of Cherries in the Snow. It’s like a winter wonderland in dessert form. The snowy layers of whipped topping and cream cheese paired with glossy cherry pie filling make it ideal for Christmas tables, Valentine’s Day dinners, and New Year’s Eve buffets. Plus, it feels like a homemade treat even though it takes just minutes to prepare.
Looking for a Christmas-worthy twist? Layer it in a trifle dish and top with white chocolate curls or sugared cranberries for an eye-catching centerpiece.
Great for parties, potlucks, and family gatherings
Need something crowd-pleasing and easy to transport? This is it. Because it’s made in a 9×13 dish, it’s perfect for potlucks, office parties, or family dinners. No oven? No problem. No decorating skills? Still a show-stopper.
It travels well, holds up in the fridge, and serves up beautifully with just a spoon. And unlike some baked desserts, it doesn’t dry out or need to be served warm. Cold and creamy is the goal here.
Kid-friendly and adult-approved
This dessert hits the sweet spot for both kids and adults. It’s not too rich, not too heavy, and delivers that perfect mix of creamy and fruity. Kids love the soft cake texture and bright cherry topping. Adults love that it’s not overly sweet and has that nostalgic “grandma made this” feel.
Want to involve kids in the kitchen? Let them layer the dessert in cups. It’s mess-free, fun, and gets them excited about eating it.
FAQs About Cherries in the Snow
Can I use homemade whipped cream instead of Cool Whip?
Yes! Just make sure to beat it to soft peaks and don’t overwhip. Use about 3 cups of homemade whipped cream to replace one 8-ounce tub of Cool Whip.
How far in advance can I make it?
You can make this dessert up to 24 hours ahead. In fact, the flavor improves as it sits. Just keep it refrigerated and covered until ready to serve.
Can I freeze Cherries in the Snow?
Freezing isn’t recommended. The whipped topping and cream cheese layer may separate and become watery upon thawing. For best texture, enjoy within 2–3 days fresh from the fridge.
What other fruit fillings work well?
Try blueberry, raspberry, strawberry, peach, or even mixed berry pie fillings. The base is neutral, so it pairs well with almost any fruit topping.
Can I use pound cake instead of angel food cake?
You can! Pound cake makes the dessert a little denser and richer. Just ensure it’s cut into small, even cubes and folded in gently.
Conclusion: A Dessert That Never Goes Out of Style
Cherries in the Snow is everything we love in a dessert—quick, creamy, fruity, and beautiful. It’s the kind of recipe that feels special without needing much effort. Whether you’re hosting a holiday dinner or just want to impress with something homemade, this dessert delivers every time.
Customize it with different fruit toppings, serve it in fancy glassware, or keep it classic in a casserole dish. However you enjoy it, one thing’s for sure—it will always leave your guests asking for seconds.
Don’t miss our Mini Cherry Cheesecakes or Cranberry White Chocolate Cheesecake for more fruity dessert ideas that are just as easy and irresistible.
PrintCherries in the Snow

Cherries in the Snow is a light, no-bake dessert made with layers of fluffy angel food cake, sweetened cream cheese, whipped topping, and cherry pie filling. It’s quick, creamy, and perfect for holidays or gatherings.
- Prep Time: 15 minutes
- Cook Time: 0 minutes
- Total Time: 45 minutes
- Yield: 12 servings 1x
- Category: Dessert
- Method: No-Bake
- Cuisine: American
- Diet: Vegetarian
Ingredients
- 12 oz cream cheese, room temperature
- 3/4 cup powdered sugar, sifted
- 1/3 cup whole milk
- 1/2 tsp vanilla extract
- 8 oz frozen whipped topping, thawed
- 1 pre-baked angel food cake, torn into 3/4 to 1-inch pieces
- 2 cans (21 oz each) cherry pie filling
Instructions
- Beat the cream cheese in a large bowl using an electric mixer on medium-high speed until smooth and fluffy.
- Add powdered sugar and beat again until fully combined.
- Mix in milk and vanilla extract until the mixture is smooth and fluffy.
- Gently fold in the whipped topping until fully incorporated.
- Fold in the torn angel food cake pieces carefully to retain the fluffiness.
- Spread the cream mixture evenly in a 9×13 inch baking dish.
- Spoon the cherry pie filling evenly over the top.
- Refrigerate for at least 30 minutes to 2 hours before serving.
Notes
- Use room temperature cream cheese to prevent lumps.
- Homemade whipped cream can be used instead of Cool Whip.
- For a holiday presentation, layer in a trifle dish or clear cups.
- Store leftovers in an airtight container in the fridge for up to 2 days.
- Can be made up to 24 hours in advance.
Nutrition
- Serving Size: 1 slice
- Calories: 206
- Sugar: 12g
- Sodium: 233mg
- Fat: 2g
- Saturated Fat: 1g
- Unsaturated Fat: 0.5g
- Trans Fat: 0g
- Carbohydrates: 43g
- Fiber: 1g
- Protein: 6g
- Cholesterol: 7mg