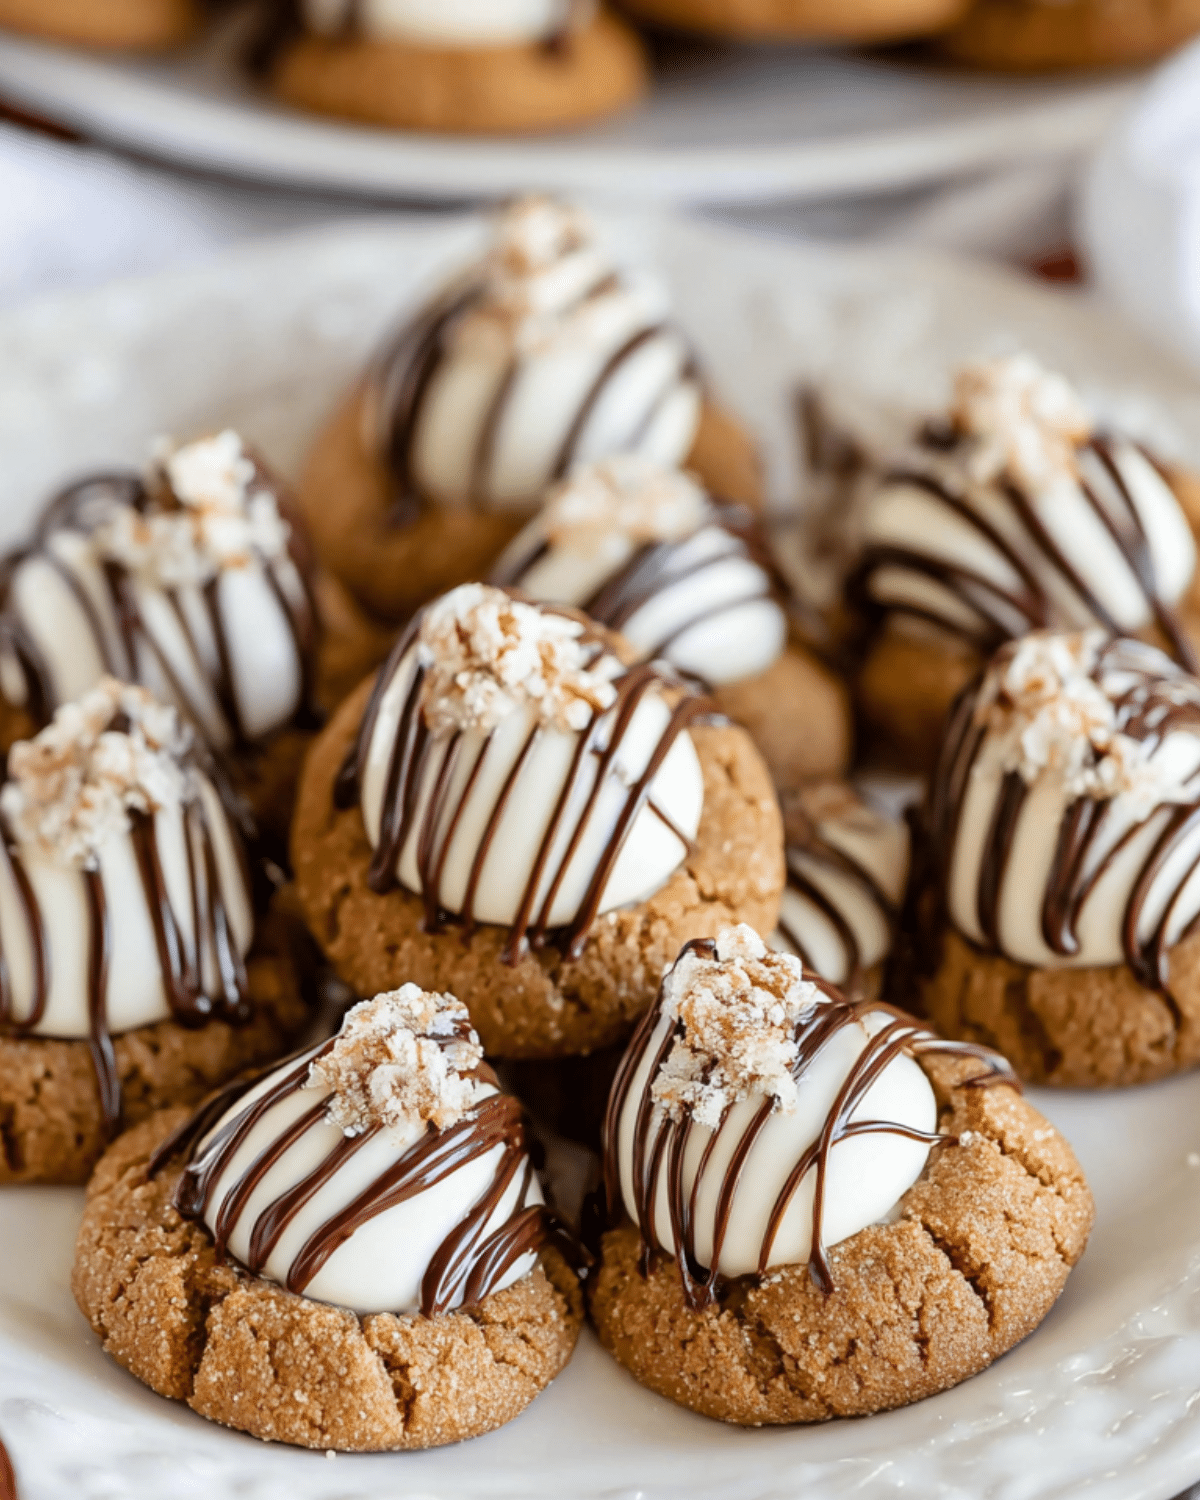
The holiday season calls for warm kitchens, sweet spices, and unforgettable cookie recipes. Gingerbread Kiss Cookies combine everything festive in one bite — the spicy charm of gingerbread, the sweetness of molasses, and the creamy delight of a Hershey’s Kiss nestled on top. Whether you’re hosting a holiday party, filling up your Christmas cookie tray, or prepping gifts for neighbors, this cookie recipe delivers flavor, fun, and plenty of compliments.
In this guide, we’ll walk you through exactly what makes these cookies so special, how to bake them to soft perfection, and clever ways to store or tweak the recipe. Don’t miss our chocolate peppermint cookies for more cookie tray inspiration.
JUMP TO
Table of Contents
What Makes Gingerbread Kiss Cookies a Seasonal Favorite?
The nostalgic flavor of gingerbread spice and molasses
Few things capture the holiday spirit quite like gingerbread. With a perfect blend of warm spices—ginger, cinnamon, cloves, and nutmeg—paired with the richness of unsulphured molasses, these cookies evoke the cozy feeling of family gatherings, twinkling lights, and hot drinks by the fireplace. Every bite reminds you of Christmases past while creating new traditions.
Hershey’s Kisses twist on a classic tradition
Gingerbread cookies are a holiday staple, but the addition of a Hershey’s Kiss pressed into the center transforms this recipe into a modern holiday hit. The chocolate creates a creamy, sweet contrast to the spice, making each cookie both indulgent and well-balanced. Striped hugs or classic milk chocolate kisses each bring their own flair.
Why they’re perfect for cookie swaps and gifting
These cookies aren’t just delicious—they’re stunning. Rolled in sparkly white sugar and crowned with chocolate, they offer a bakery-style finish with minimal effort. Their small size (about 1-inch wide) makes them ideal for sharing at cookie exchanges or packaging into gift boxes. Bonus? This recipe makes around 60 cookies—enough for everyone!
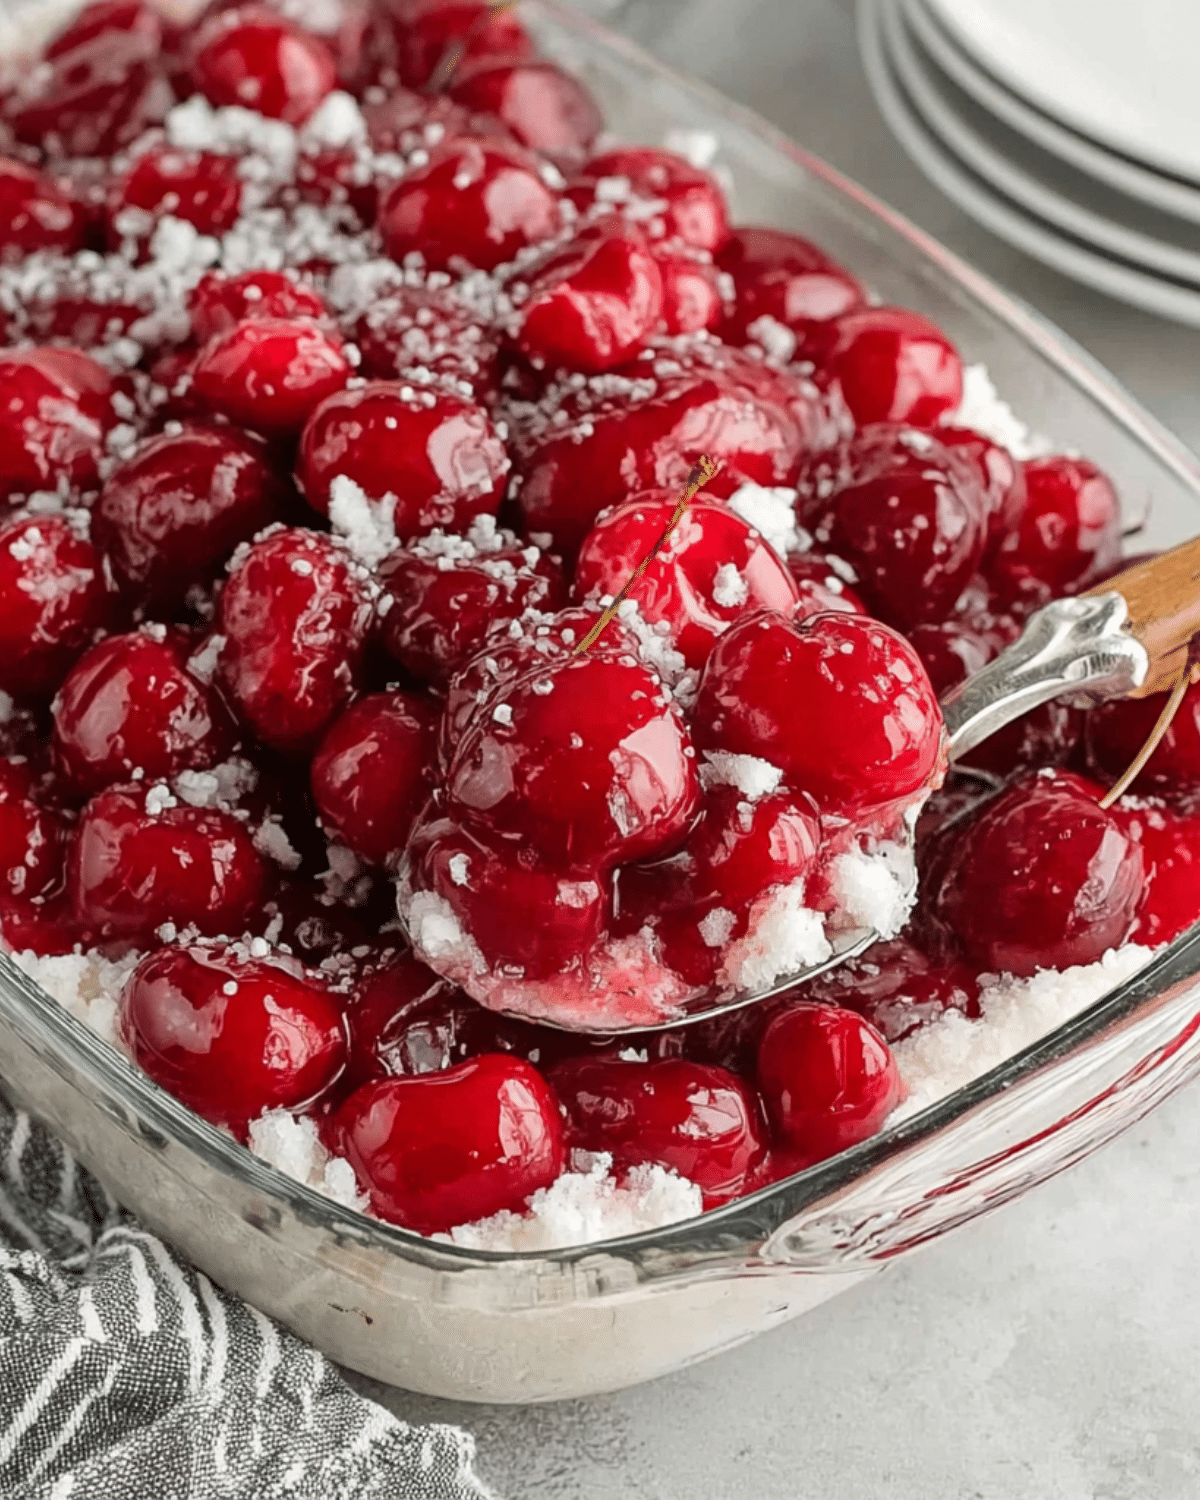
Looking for more giftable treats? Check out our cranberry white chocolate cheesecake that also dazzles during the holidays.
Essential Ingredients for Gingerbread Kiss Cookies

Key pantry staples and festive flavors
Here’s what you’ll need for the base:
| Ingredient | Purpose |
|---|---|
| All-purpose flour | Foundation of the cookie dough |
| Baking soda & salt | Structure and balance |
| Ground ginger, cinnamon, cloves, nutmeg | Signature holiday spice blend |
| Unsalted butter | Rich flavor and moisture |
| Light brown sugar | Softness and depth |
| Egg & vanilla extract | Binding and aroma |
| Unsulphured molasses | Adds chew and signature flavor |
| Granulated sugar | For rolling (adds sparkle & crunch) |
| Hershey’s Kisses (or Hugs) | Signature chocolate center |
These ingredients are easy to find and, when combined, create cookies that are chewy, flavorful, and holiday-ready.
Choosing the right molasses and spices
Always opt for unsulphured molasses—it’s milder and more pleasant in flavor. Sulphured varieties can taste bitter and overpower the cookie. As for spices, use fresh ground versions when possible. The brighter the spices, the better the flavor.
Want to level up the aroma in your kitchen? Try adding a pinch of cardamom or mace. Discover great ideas like our gingerbread cake recipe to see how versatile these spices really are.
Best chocolate kisses to use (classic vs striped hugs)
While the original Hershey’s Kisses are a timeless choice, Hershey’s Hugs (white and milk chocolate striped) add a visual twist. Either option melts slightly into the cookie, giving that gooey center without losing its shape. Just remember to unwrap them while the cookies bake—timing is everything.
Don’t miss our reindeer cupcakes for more creative uses of holiday candies.
Step-by-Step Guide to Making Gingerbread Kiss Cookies
Preparing the dough for perfect texture
Start by preheating your oven to 350°F (180°C) and lining your baking sheets with parchment or silicone mats.
In one bowl, whisk together all the dry ingredients: all-purpose flour, baking soda, salt, and all the spices—ginger, cinnamon, cloves, and nutmeg. Set this aside.
In a mixing bowl fitted with a paddle attachment (or using a hand mixer), beat softened unsalted butter and light brown sugar until creamy. Add in the egg and a splash of vanilla extract. Once that’s smooth, pour in ½ cup of unsulphured molasses and blend thoroughly.
Now slowly incorporate the dry ingredients. The dough will look dense and dry, but that’s exactly how it should be—don’t overmix.
Looking for a fun holiday twist? Try our raspberry linzer cookies for a jam-filled festive favorite.
Rolling and baking with precision
Using a 1-inch cookie scoop, portion out the dough and roll each scoop into a smooth ball. Then, roll each ball in granulated sugar—this gives the cookies their classic sparkly finish and helps them crack beautifully on top while baking.
Place the dough balls about an inch apart on your lined baking sheets. These cookies don’t spread much, so you can fit more per tray than usual.
Bake for exactly 8 minutes. They’ll look soft and slightly puffed—don’t worry if they appear underbaked. That’s what makes them chewy and perfect.
Don’t miss our festive crinkle cookies** if you enjoy the sugar-rolled look.
When to press the chocolate kisses on top
Timing is key here. While your cookies are baking, unwrap the Hershey’s Kisses and have them ready.
Once the cookies are out of the oven, let them cool for about 4 minutes. This gives them enough time to firm up slightly, so the kiss doesn’t melt entirely but still sticks perfectly.
Press the kiss gently into the center of each cookie, pushing just enough to nestle it in. Allow the cookies to cool completely on a wire rack before storing.
Baking Tips and Troubleshooting
Avoiding dry or crumbly cookies
If your cookies come out dry, there are two likely causes:
- You baked them too long (even an extra minute can overdry them).
- You added too much flour—always spoon flour into your measuring cup and level it with a knife. Don’t scoop directly from the bag.
Dry cookies don’t have to ruin the batch. Try pairing them with a glass of milk or sandwiching two together with a bit of icing for rescue!
How to prevent melted or falling kisses
The kisses can easily melt if added too early, or fall off if added too late. The sweet spot? Exactly 4 minutes after removing the cookies from the oven.
Use a timer if needed. Gently press the kiss in and allow the cookie to “set” around it as it cools.
Size matters – use a cookie scoop for consistency
These cookies are small and uniform—using a 1-inch cookie scoop ensures they bake evenly and look beautiful. It also keeps the chocolate-to-cookie ratio just right.
Want something a little different? Try a medium scoop and flatten the dough before baking, then press chopped chocolate instead of a whole kiss for a chunkier version.
Looking for more uniform cookie tips? Check out our mini cherry cheesecakes for bite-sized holiday perfection.
Make-Ahead, Storage, and Freezing Instructions
Storing freshly baked cookies
Once your cookies are fully cooled and the kisses are set, transfer them to an airtight container. They’ll stay soft and chewy at room temperature for up to 5 days.
Pro tip: Add a slice of white bread to the container. It’ll help absorb excess air moisture and keep your cookies soft longer.
Freezing unbaked dough vs baked cookies
Planning ahead for a cookie swap? This recipe is freezer-friendly!
- To freeze unbaked dough: Roll into balls, skip the sugar coating, and place them on a tray to freeze. Once frozen, transfer to a freezer bag. When ready to bake, thaw the dough slightly, roll in sugar, and bake as usual.
- To freeze baked cookies: Lay in a single layer between wax paper in an airtight container. They’ll last up to 3 months. Thaw at room temp before serving.
How to thaw and serve for best taste
When defrosting, let cookies come to room temperature naturally—avoid microwaving or reheating, which can melt the chocolate or alter the texture. They taste just as fresh with a warm drink!
Want more make-ahead dessert ideas? Check out our dreamy cotton candy fudge for another festive freezer-friendly treat.
Delicious Variations on the Classic Recipe
Chocolate-dipped gingerbread kiss cookies
Once baked and cooled, dip half of each cookie into melted white or dark chocolate and let it harden on wax paper. Add sprinkles for a dazzling finish.
Gingerbread thumbprint cookies with caramel
Swap out the kiss for a small spoonful of salted caramel. Press your thumb into the dough before baking and fill the center once cooled.
Gluten-free or vegan gingerbread kiss options
For gluten-free: Use a 1:1 GF flour blend like Bob’s Red Mill or King Arthur.
For vegan: Swap the butter for vegan baking sticks, the egg for a flax egg, and use dairy-free chocolate drops instead of Hershey’s kisses.
For more diet-friendly bakes, don’t miss our vegan oatmeal cranberry cookies that are just as festive.
FAQs about Gingerbread Kiss Cookies
Why didn’t my cookies crack on top?
This usually happens if the dough is too wet or if you skip rolling in sugar. The sugar helps dry the exterior just enough to create those pretty holiday cracks. Also, don’t overbake.
Can I use other types of chocolate on top?
Absolutely. While Hershey’s Kisses are traditional, mini peanut butter cups, dark chocolate squares, or even truffles can be pressed into the center. Just be sure they’re not too large or heavy for the cookie base.
What’s the best way to keep them soft for days?
Store in a tightly sealed container with a slice of bread or apple peel. This old-school trick maintains the right moisture level. Avoid refrigeration—it dries them out.
Can I make the dough ahead and bake later?
Yes, the dough can be refrigerated for up to 3 days or frozen for up to 3 months. Let it thaw in the fridge overnight before rolling and baking.
Do I need a stand mixer?
Nope! A hand mixer works perfectly. For the final mixing stage, you might need to knead the dough by hand since it’s thick, but it’s totally doable without fancy gear.
Final Thoughts on Baking the Best Gingerbread Kiss Cookies
Gingerbread Kiss Cookies strike the perfect balance between tradition and creativity. With their bold spices, soft texture, and melty chocolate centers, they’re a standout addition to any holiday celebration. Whether you follow the classic recipe or put your own spin on it, this cookie is sure to become a beloved part of your seasonal baking ritual.
Looking for inspiration? Try our Christmas monster cookies for more whimsical cookie ideas that wow on a tray.
PrintGingerbread Kiss Cookies

Soft, spiced, and rolled in sparkly sugar, these Gingerbread Kiss Cookies are topped with a creamy Hershey’s Kiss for the ultimate festive treat. Perfect for cookie swaps, gifting, or your holiday dessert tray.
- Prep Time: 20 minutes
- Cook Time: 8 minutes
- Total Time: 28 minutes
- Yield: 60 cookies
- Category: Dessert
- Method: Baking
- Cuisine: American
- Diet: Vegetarian
Ingredients
- 3 cups (385g) all-purpose flour
- 1 teaspoon baking soda
- ½ teaspoon salt
- 2 teaspoons ground ginger
- 1½ teaspoons ground cinnamon
- ½ teaspoon ground cloves
- ½ teaspoon ground nutmeg
- ¾ cup (170g) unsalted butter, at room temperature
- ¾ cup light brown sugar
- 1 large egg, at room temperature
- 1 teaspoon vanilla extract
- ½ cup unsulphured molasses
- ½ cup granulated sugar (for rolling)
- 60 Hershey’s Hugs or Kisses, unwrapped
Instructions
- Preheat oven to 350°F (180°C). Line baking sheets with parchment paper or silicone mats.
- In a large bowl, whisk together flour, baking soda, salt, ginger, cinnamon, cloves, and nutmeg.
- In a stand mixer or large bowl, beat butter and brown sugar until smooth. Add egg and vanilla, then beat until creamy.
- Add molasses and mix until well combined.
- Gradually mix in the dry ingredients on low speed until a thick dough forms.
- Use a 1-inch cookie scoop to portion dough. Roll into balls, then coat each ball in granulated sugar.
- Place on prepared baking sheets about 1 inch apart. Bake for 8 minutes.
- While baking, unwrap the Hershey’s Kisses.
- Remove cookies from oven and let cool for 4 minutes. Then, press a chocolate kiss into the center of each cookie.
- Let cookies cool completely before storing in an airtight container.
Notes
- Don’t overbake—cookies will continue to set as they cool.
- Use unsulphured molasses for the best flavor.
- Freeze dough for up to 3 months for future baking.
- Unwrap kisses while cookies bake to save time.
- Store cookies with a slice of bread to keep them soft.