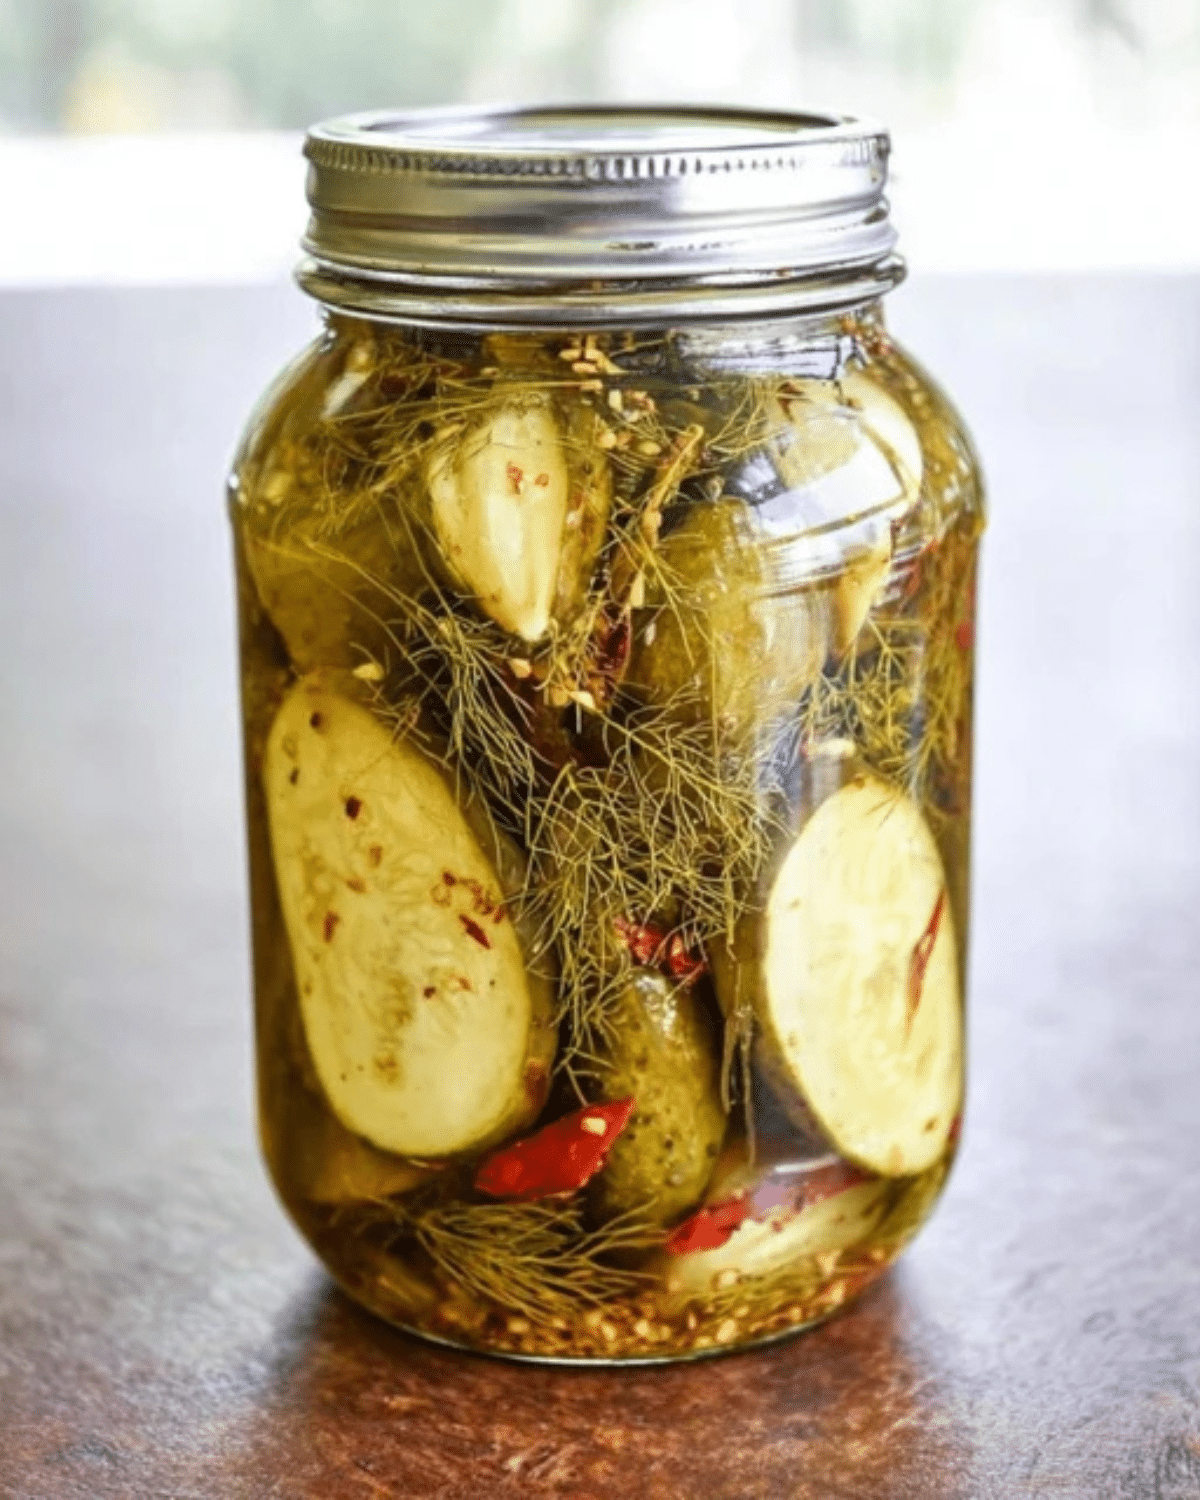
KILLER SPICY GARLIC DILL PICKLES are the ultimate homemade pickle for anyone who loves bold flavor, serious crunch, and a spicy kick. These KILLER SPICY GARLIC DILL PICKLES combine fresh cucumbers, garlic cloves, fragrant dill, and fiery chili heat in a perfectly balanced brine. The result is a crisp, tangy, garlicky pickle that gets better with every bite.
In this complete guide, you’ll learn how to choose the right cucumbers, create a powerful brine, control the spice level, and store your KILLER SPICY GARLIC DILL PICKLES safely. Whether you’re new to pickling or already obsessed, this recipe delivers maximum flavor with simple ingredients.
JUMP TO
Table of Contents
Why KILLER SPICY GARLIC DILL PICKLES Are So Addictive
KILLER SPICY GARLIC DILL PICKLES stand out because they deliver three strong flavor layers: tangy vinegar brine, fresh dill aroma, and punchy garlic heat.
The Perfect Balance of Heat and Tang
These pickles aren’t just spicy — they’re balanced. The vinegar provides acidity, salt enhances flavor, garlic adds depth, and chili flakes or fresh peppers bring controlled heat.
Because the spice infuses gradually, KILLER SPICY GARLIC DILL PICKLES become more intense over time.
Crunch Is Everything
The key to truly killer pickles is crunch. Using fresh pickling cucumbers and proper brining techniques keeps them firm and snappy.
Ingredients for the Best KILLER SPICY GARLIC DILL PICKLES
Choosing fresh, high-quality ingredients is essential.
Essential Ingredients

| Ingredient | Quantity | Notes |
|---|---|---|
| Pickling cucumbers | 2 lbs | Washed and trimmed |
| White vinegar (5% acidity) | 2 cups | Required for safe brining |
| Water | 2 cups | Filtered preferred |
| Kosher salt | 2 tablespoons | Non-iodized |
| Garlic cloves | 8–10 | Lightly smashed |
| Fresh dill sprigs | 4–6 | Or 2 tbsp dill seeds |
| Red pepper flakes | 1–2 teaspoons | Adjust heat level |
| Whole black peppercorns | 1 teaspoon | Optional depth |
| Fresh jalapeños | 1–2 sliced | Optional extra heat |
Because iodized salt can cloud brine, always use kosher or pickling salt.
Step-by-Step Guide to Making KILLER SPICY GARLIC DILL PICKLES
Step 1 – Prepare the Cucumbers
Wash cucumbers thoroughly and trim off the blossom ends. Cutting off this small portion helps maintain crunch.
You can slice them into spears, rounds, or leave whole if small.
Step 2 – Prepare the Jars
Sterilize glass jars by washing them in hot soapy water and rinsing thoroughly.
Place:
- Garlic cloves
- Dill sprigs
- Peppercorns
- Red pepper flakes
- Jalapeño slices
at the bottom of each jar.
Step 3 – Make the Brine
In a saucepan, combine:
- Vinegar
- Water
- Kosher salt
Bring to a gentle boil, stirring until salt dissolves completely.
Because correct acidity is essential, maintain the 1:1 vinegar-to-water ratio.
Step 4 – Pack and Pour
Tightly pack cucumbers into jars. Then carefully pour the hot brine over them, leaving about ½ inch headspace.
Seal jars with lids.
Step 5 – Cool and Store Your KILLER SPICY GARLIC DILL PICKLES
Once the hot brine is poured over the cucumbers, allow the jars to cool at room temperature for about 1 hour. As they cool, the cucumbers begin absorbing the bold garlic dill flavor.
After cooling, place the jars in the refrigerator. For the best flavor, let the KILLER SPICY GARLIC DILL PICKLES sit for at least 48 hours before tasting. However, if you can wait 4–5 days, the heat and garlic intensity will deepen beautifully.
Because this recipe is designed as a refrigerator pickle method, no water bath canning is required. Simply keep refrigerated at all times.
How to Customize the Heat Level
One of the best things about KILLER SPICY GARLIC DILL PICKLES is that you can adjust the spice to match your preference.
For Mild Heat
- Use only ½ teaspoon red pepper flakes
- Skip fresh jalapeños
- Add extra dill for more herbal balance
For Medium Heat
- Use 1 teaspoon red pepper flakes
- Add 1 sliced jalapeño
- Keep garlic at full strength
For Extra-Killer Heat
- Use 2 teaspoons red pepper flakes
- Add 2 jalapeños with seeds
- Include a pinch of cayenne pepper
Because the heat intensifies over time, start conservatively if you’re unsure.
Tips for Extra Crunchy KILLER SPICY GARLIC DILL PICKLES
Crunch is what separates average pickles from truly killer ones.
Always Use Fresh Pickling Cucumbers
Fresh, firm cucumbers with thin skins work best. Avoid soft or waxy grocery store varieties.
Trim the Blossom Ends
The blossom end contains enzymes that can soften pickles. Trimming this small piece helps preserve texture.
Keep Everything Cold After Brining
Refrigeration slows softening and preserves crispness.
How Long Do KILLER SPICY GARLIC DILL PICKLES Last?
When stored properly in the refrigerator, KILLER SPICY GARLIC DILL PICKLES stay fresh for up to 4 weeks.
Always check for:
- Cloudy brine
- Off smell
- Slimy texture
If any of these appear, discard immediately.
Frequently Asked Questions About KILLER SPICY GARLIC DILL PICKLES
Do I Have to Use White Vinegar?
Yes. Use vinegar labeled 5% acidity to ensure safe pickling. Apple cider vinegar can be substituted if it also contains 5% acidity.
Can I Reuse the Brine?
It’s not recommended for food safety reasons. Always prepare fresh brine for each batch.
Why Are My Pickles Soft?
Common reasons include:
Not trimming blossom ends
Using old cucumbers
Incorrect salt ratio
Can I Make These Shelf-Stable?
This specific recipe is for refrigerator pickles. For shelf-stable canning, follow tested water bath canning guidelines from trusted food preservation authorities.
Conclusion: Why These KILLER SPICY GARLIC DILL PICKLES Live Up to Their Name
KILLER SPICY GARLIC DILL PICKLES are bold, crunchy, garlicky, and unapologetically spicy. Because they’re easy refrigerator pickles, anyone can make them at home without complicated equipment. Moreover, they pair perfectly with burgers, sandwiches, grilled meats, or even straight from the jar.
Once you try these KILLER SPICY GARLIC DILL PICKLES, store-bought versions may never satisfy you again.
PrintKILLER SPICY GARLIC DILL PICKLES – Crunchy & Fiery

KILLER SPICY GARLIC DILL PICKLES are bold, crunchy, and packed with fresh dill, garlic, and fiery heat. These easy refrigerator pickles deliver tangy flavor and serious spice in every bite.
- Prep Time: 20 minutes
- Cook Time: 5 minutes
- Total Time: 25 minutes (plus 48 hours chilling)
- Yield: 2 quart jars 1x
- Category: Condiment
- Method: Refrigerator Pickling
Ingredients
- 2 lbs pickling cucumbers, washed and trimmed
- 2 cups white vinegar (5% acidity)
- 2 cups water
- 2 tablespoons kosher salt (non-iodized)
- 8–10 garlic cloves, lightly smashed
- 4–6 fresh dill sprigs (or 2 tablespoons dill seeds)
- 1–2 teaspoons red pepper flakes (adjust to heat preference)
- 1 teaspoon whole black peppercorns (optional)
- 1–2 fresh jalapeños, sliced (optional for extra heat)
Instructions
- Wash cucumbers thoroughly and trim the blossom ends. Cut into spears, rounds, or leave whole if small.
- Sterilize glass jars with hot soapy water and rinse well.
- Place garlic, dill, peppercorns, red pepper flakes, and jalapeño slices in the bottom of each jar.
- Pack cucumbers tightly into the jars.
- In a saucepan, combine vinegar, water, and kosher salt. Bring to a gentle boil, stirring until salt dissolves.
- Carefully pour hot brine over cucumbers, leaving 1/2 inch headspace.
- Seal jars and allow to cool at room temperature for about 1 hour.
- Refrigerate for at least 48 hours before serving for best flavor.
Notes
- Use fresh, firm pickling cucumbers for maximum crunch.
- Always use vinegar labeled 5% acidity for safe pickling.
- Trim blossom ends to prevent soft pickles.
- Flavor intensifies after 3–5 days in the refrigerator.
- Store refrigerated for up to 4 weeks.
- Do not reuse brine for food safety reasons.
Nutrition
- Serving Size: 1 pickle spear
- Calories: 10
- Sugar: 1g
- Sodium: 220mg
- Fat: 0g
- Saturated Fat: 0g
- Unsaturated Fat: 0g
- Trans Fat: 0g
- Carbohydrates: 2g
- Fiber: 0g
- Protein: 0g
- Cholesterol: 0mg