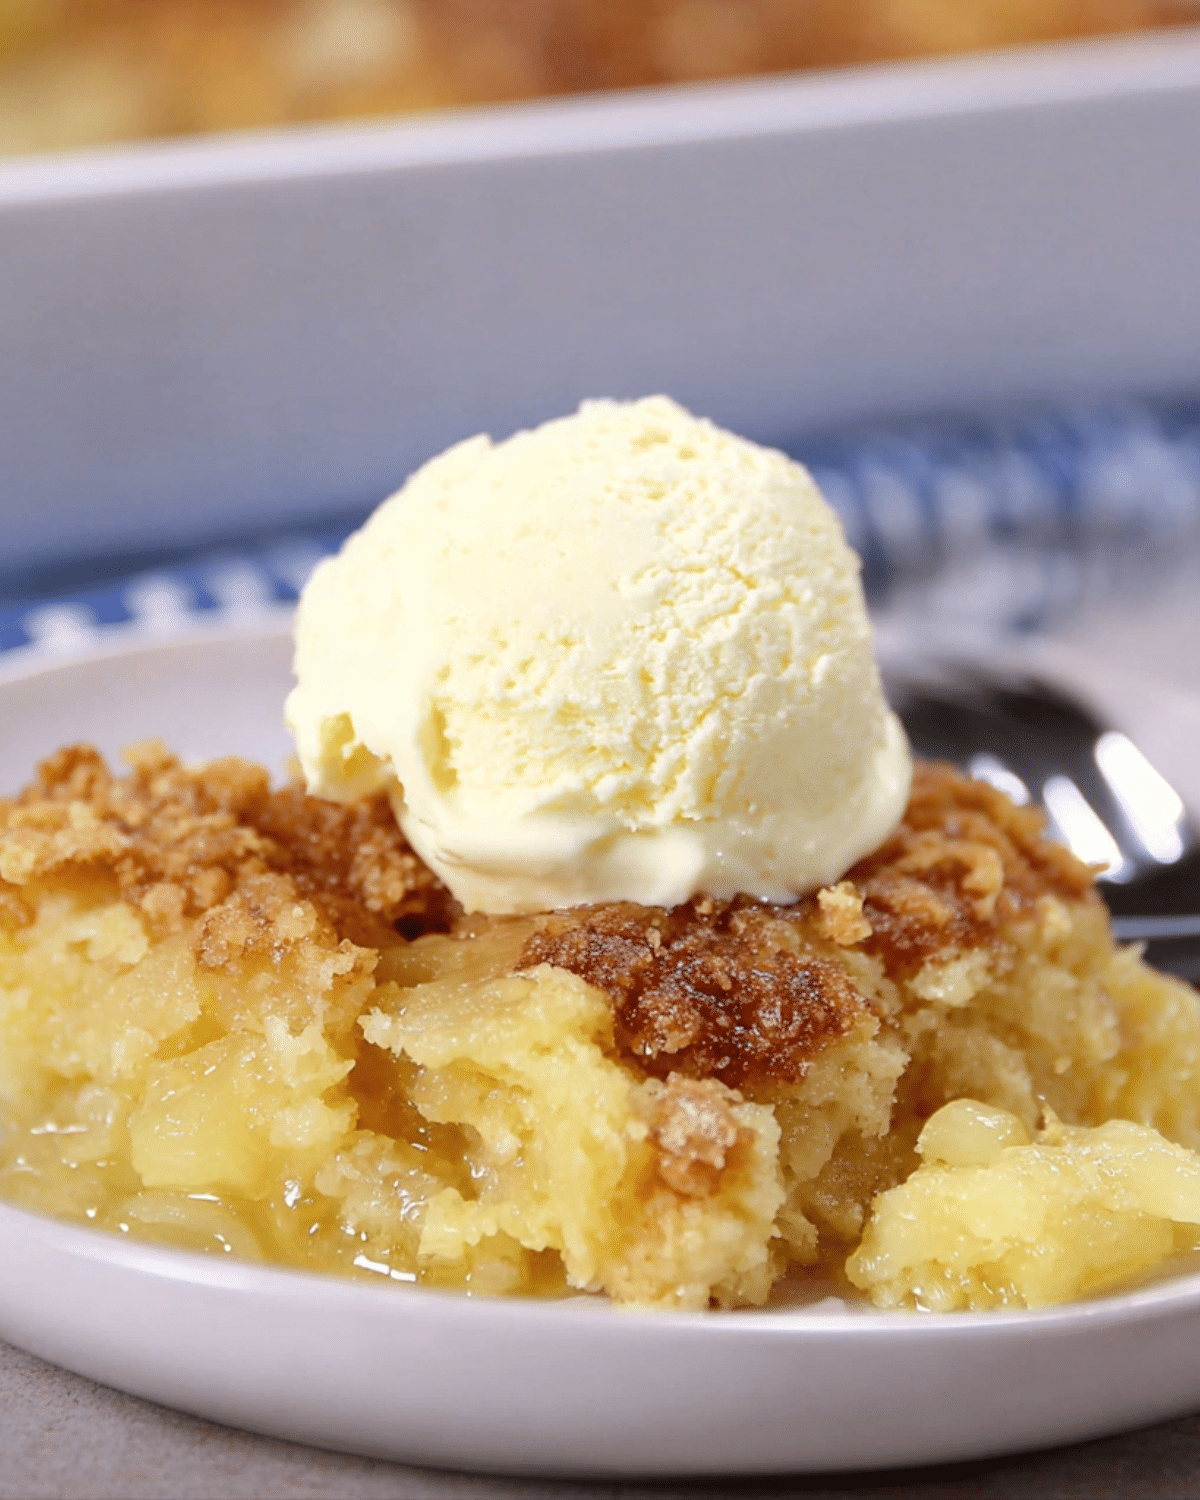
When it comes to quick and satisfying desserts, pineapple dump cake stands out as a no-fail classic that’s equal parts delicious and effortless. Made with just a handful of pantry staples and minimal prep, this golden, buttery dessert is a favorite for casual dinners, family gatherings, and spontaneous sweet cravings. If you’re looking for a treat that’s as simple as it is crowd-pleasing, this fruity dump cake delivers every time.
In this article, you’ll learn why pineapple dump cake is a go-to dessert for home bakers, what ingredients make it special, and how to whip it up in under 10 minutes of prep. We’ll also cover tasty variations, storage tips, and helpful answers to the most asked questions. Looking for inspiration? Try our pineapple upside-down cake recipe if you want a twist on another pineapple favorite.
JUMP TO
Table of Contents
Why Pineapple Dump Cake Is Everyone’s Favorite Quick Dessert
A Timeless Dessert with Minimal Effort
The beauty of pineapple dump cake lies in its simplicity. You literally “dump” the ingredients into a baking dish—no mixing bowls, no electric mixers, and absolutely no stress. This style of cake has been a staple in American kitchens since the mid-20th century, especially popularized for its convenience and low cost. It’s the ideal beginner-friendly bake that feels homemade and indulgent without the hassle of traditional cakes.
Pantry Staples Make It Budget-Friendly
What makes this recipe truly stand out is how accessible it is. Most versions require five or fewer ingredients—all of which are probably sitting in your pantry right now. You’ll need canned crushed pineapple (don’t drain it!), boxed yellow cake mix, real butter, and optional toppings like chopped pecans or brown sugar for added flavor and texture. With such a short list, there’s no excuse not to give it a go.
Don’t miss our creamy pumpkin pasta recipe if you’re looking to pair this dessert with a cozy fall dinner.
Perfect for Potlucks, BBQs, or Weeknight Treats
Because it’s baked in a 9×13-inch dish and travels well, pineapple dump cake is the perfect dessert for a summer cookout, church potluck, or casual dinner party. It’s also a great make-ahead option. Just bake, cool slightly, cover, and carry. No elaborate frosting or decoration needed.
Check out our peach bars recipe for another easy-to-transport dessert that’s always a hit.
Ingredients You’ll Need for the Best Pineapple Dump Cake
Crafting the perfect pineapple dump cake comes down to using simple, quality ingredients. While the recipe doesn’t require much, each component plays a key role in texture and flavor. Let’s explore how to choose the best versions and some smart swaps to make it your own.
Crushed Pineapple vs. Pineapple Chunks
The heart of this dessert is the pineapple—and not just any kind. Crushed pineapple in juice is the most commonly used variety because it spreads easily across the bottom of the dish and bakes evenly. The natural juice soaks into the cake mix, keeping everything moist and flavorful.
If all you have on hand is pineapple chunks or tidbits, don’t worry. Just pulse them in a food processor a few times to break them down slightly. Keep the juice! Draining the pineapple is a common mistake that results in a dry dump cake.
Looking for inspiration? Try our apple crumb cake recipe for another fruity dessert that’s equally satisfying.
Choosing the Right Cake Mix
Most traditional dump cake recipes call for a yellow cake mix, which offers a buttery, vanilla-like flavor that complements the pineapple beautifully. However, you can switch things up with:
- White cake mix for a lighter flavor
- Spice cake mix for autumn vibes
- Butter pecan mix for extra richness
Whichever you choose, make sure it’s a dry boxed mix—no need to prepare it per package instructions.
The Butter Debate – Sliced or Melted?
Dump cake lovers are divided on this one. Some swear by slicing cold butter into thin pats and dotting them across the cake mix. Others, like in the Miss in the Kitchen recipe, prefer melting the butter and drizzling it evenly. Both methods work, but melted butter tends to give more even coverage, helping create that crispy golden topping.
Whatever you do, use real unsalted butter—not margarine or butter blends. The flavor payoff is worth it.
Optional Add-ins: Brown Sugar, Pecans, Coconut Flakes
Want to take your pineapple dump cake to the next level? Add some personality with these extras:
- Brown sugar: Sprinkle a layer between the cake mix and butter for a deep, caramelized flavor.
- Chopped pecans or walnuts: Adds a delightful crunch and nutty taste.
- Sweetened coconut flakes: Great for a tropical twist.
- Cinnamon or nutmeg: A light dusting brings warmth and pairs well with brown sugar.
These are all optional, but highly recommended if you want a signature flavor that stands out.
Discover great ideas like our carrot cake with pineapple recipe if you’re into nutty, fruity cakes.
How to Make Pineapple Dump Cake (Step-by-Step)
This is the part where the magic happens. The best thing about pineapple dump cake is that it doesn’t require any fancy tools or complicated techniques. It’s the kind of recipe that even beginners can master on the first try—and it always impresses.
Prep and Layer: What Goes in First?
Start by preheating your oven to 350°F (175°C). Then grab a 9×13-inch baking dish—no need to grease it. Here’s the quick layering process:
- Dump both cans of crushed pineapple into the baking dish (juice included). Spread it evenly with a spoon.
- Sprinkle the dry yellow cake mix over the pineapple in an even layer. Try not to mix them.
- Top with your optional add-ins like brown sugar and chopped pecans for extra richness and crunch.
- Drizzle melted butter evenly across the surface, covering as much of the cake mix as possible. This helps it bake into a crisp, golden topping.
Check out our southern green bean casserole if you’re planning this for a holiday dinner and want a full meal plan.
Tips to Get That Golden Crunchy Top
Getting that perfect, crisp topping is easier than you think. The key is even butter distribution. If dry patches of cake mix are left exposed, they may stay powdery even after baking.
Here are a few additional pro tips:
- Don’t stir the layers once you’ve added them. The magic happens in the oven.
- Place the dish on a baking sheet to catch any bubbling juice that might overflow.
- For extra crunch, add a handful of oats or granola over the top before baking.
Bake for about 55 to 60 minutes, or until the edges are bubbling and the top is evenly golden brown.
Don’t miss our pumpkin crisp recipe for another dump-style dessert with a fall twist.
Serving Suggestions – Ice Cream, Whipped Cream, and More
Let your dump cake cool for at least 15–20 minutes after baking. This allows the layers to settle and makes it easier to serve.
Here are a few topping ideas to elevate your dessert:
| Topping | Why It Works |
|---|---|
| Vanilla Ice Cream | Melts into the warm cake for a creamy finish |
| Whipped Cream | Adds lightness to balance the richness |
| Toasted Coconut | Boosts the tropical vibe |
| Maraschino Cherries | A colorful, sweet touch |
Serve warm or at room temperature. If you have leftovers (you probably won’t), just cover with foil or wrap and refrigerate.
Don’t miss our nectarine cobbler recipe if you’re craving more fruit-forward, rustic desserts.
Easy Variations to Try with Pineapple Dump Cake
One of the best things about pineapple dump cake is how versatile it is. Whether you want to tweak the flavor, cater to dietary needs, or simply try something new, there are countless ways to customize this beloved dessert. Let’s explore some delicious options.
Pineapple Cherry Dump Cake
This combo is a fan favorite—and for good reason. The tartness of cherry pie filling pairs beautifully with the sweet, tropical flavor of pineapple. Here’s how to make it:
- Spread one can of crushed pineapple (with juice) in the baking dish.
- Layer one can of cherry pie filling over the pineapple.
- Continue with the yellow cake mix, melted butter, and bake as usual.
This version is also called “Hummingbird Dump Cake” in some Southern kitchens. It’s sweet, tangy, and vibrant—a total crowd-pleaser.
Check out our sour cherry crumble bars recipe if you’re into cherry-based desserts.
Tropical Twist with Coconut and Mango
Want to transport your taste buds to the islands? Add some mango chunks and sweetened coconut flakes to the mix:
- Replace one can of pineapple with mango.
- Sprinkle ½ cup of shredded coconut over the cake mix.
- Optional: add a splash of rum extract or lime zest for a Caribbean flair.
You can even serve it with toasted coconut whipped cream for a full-on tropical dessert experience.
Looking for more island-inspired bakes? Don’t miss our coconut Raffaello cake recipe.
Gluten-Free and Dairy-Free Alternatives
Good news—dump cake can be made gluten-free and dairy-free without sacrificing flavor.
Here’s how:
| Standard Ingredient | Swap With |
|---|---|
| Yellow cake mix | Gluten-free cake mix (Betty Crocker, Simple Mills) |
| Butter | Coconut oil or dairy-free butter sticks |
| Optional toppings | Use chopped almonds instead of pecans |
Make sure your canned fruits don’t contain added gluten-containing thickeners (some do!). Always read labels if baking for someone with celiac disease.
Discover great ideas like our keto rhubarb dream bars if you need more low-carb or allergy-friendly sweets.
Storing, Reheating & Making Ahead Tips
Even though pineapple dump cake disappears fast (it’s that good), it’s smart to know how to store and reheat it correctly—especially if you’re baking ahead for a party, picnic, or busy weeknight.
How Long It Lasts at Room Temp or in the Fridge
Once the cake cools, you can leave it at room temperature for up to 2 days, loosely covered with foil or plastic wrap. This is ideal if you plan to serve it again soon.
If you need to keep it longer, store it in the refrigerator for up to 4 days. Use an airtight container or cover the baking dish tightly. The cold will firm it up slightly, but the flavor stays strong.
Looking for a fresh dessert that stores well too? Don’t miss our apple cinnamon sheet cake—perfect for make-ahead bakes.
Best Ways to Reheat Without Losing Texture
The microwave works well for quick reheating—20 to 30 seconds per serving should do the trick. But if you want to maintain that delicious golden crisp topping, the oven or toaster oven is your best friend.
Here’s how to reheat in the oven:
- Preheat to 300°F.
- Cover the dish loosely with foil to avoid burning.
- Bake for about 10–15 minutes, or until warm and bubbly.
Add a scoop of vanilla ice cream, and it’s just like fresh-baked.
Check out our white chicken chili if you need a hearty, savory dinner to serve before this sweet treat.
Can You Freeze Pineapple Dump Cake?
Absolutely. Pineapple dump cake freezes well for up to 3 months. Here’s how:
- Cool the cake completely.
- Wrap individual portions or the whole dish tightly in plastic wrap, then foil.
- Label with the date and freeze.
To reheat from frozen, let it thaw overnight in the fridge, then reheat as described above. While the topping may lose a bit of its crunch, the flavor holds up beautifully.
Don’t miss our vanilla bean brown butter cheesecake if you’re in the mood to bake and freeze even more sweet options.
Common Mistakes to Avoid When Making Dump Cakes
While pineapple dump cake is famously foolproof, there are a few small missteps that can mess with the texture or flavor. Luckily, they’re easy to avoid with a little guidance. Here’s what not to do when baking this easy dessert.
Don’t Drain the Pineapple
This is one of the most common mistakes—and it can ruin the entire bake. The juice from canned crushed pineapple is essential because it combines with the dry cake mix to form a soft, pudding-like base.
Tip: Always use pineapple packed in juice, not syrup, and pour it all in. The natural sweetness and moisture are key to the cake’s soft bottom and tangy flavor.
If you enjoy fruity, juicy bakes, check out our applesauce cake with cinnamon cream cheese frosting—moist and packed with flavor.
Even Butter Distribution Matters
Dump cake’s golden topping depends on how evenly you spread the butter. If parts of the dry cake mix are left untouched by butter, they may bake up dry or stay powdery.
Here’s how to fix it:
- Use melted butter instead of slicing cold pats.
- Pour it slowly and evenly over the entire surface.
- Tilt the pan gently to let butter flow into dry patches if needed.
Some bakers also use cooking spray on top of the cake mix to ensure even moisture—but melted butter always wins for taste.
Don’t miss our better-than-sex fruit salad recipe for another indulgent treat that’s simple and satisfying.
Avoid Overbaking the Top
Bake the cake for no more than 60 minutes at 350°F. Going over can cause the top to burn or the pineapple layer to dry out.
How to tell it’s done:
- The edges will be bubbling.
- The top should be golden brown and crisp, not dark or crusty.
- Insert a toothpick near the edge—it should come out clean.
Tip: Let the cake cool for 15–20 minutes before serving. This helps it set without drying out the edges.
Try our black raspberry jam if you want to experiment with new fruit fillings next time you bake.
FAQ – Pineapple Dump Cake Questions Answered
Can I use fresh pineapple instead of canned in dump cake?
Yes, but you’ll need to make a few adjustments. Fresh pineapple is less juicy than canned, so be sure to chop it finely and add ½ cup of pineapple juice or water to maintain the necessary moisture. Otherwise, the cake may come out dry or unevenly baked.
Is pineapple dump cake supposed to be soggy in the middle?
A little sogginess is completely normal—especially in the center. Dump cake has a unique texture that’s somewhere between a cobbler and a pudding cake. The outer edges should be golden and crisp, while the inside stays soft and gooey. If it’s too wet, it may be underbaked.
What if I don’t have a yellow cake mix?
No yellow cake mix? No problem! You can substitute with:
–White cake mix for a lighter flavor
–Spice cake mix for a fall-inspired twist
–Butter pecan cake mix for deeper richness
Each option brings its own flavor spin, so feel free to experiment based on what you have on hand.
Can I double the recipe for a crowd?
Absolutely! To feed a large group, simply double the ingredients and bake in a large roasting pan or two 9×13 dishes. Keep an eye on baking time—larger pans may take an extra 10–15 minutes. Just look for bubbling edges and a golden top as your signal to pull it from the oven.
Conclusion: Why You’ll Love This Pineapple Dump Cake Again and Again
Whether you’re baking for a holiday gathering, family potluck, or weeknight craving, pineapple dump cake always hits the sweet spot. It’s fast, affordable, and customizable with whatever you have on hand. With its juicy pineapple base, buttery topping, and endless variations, this no-fail dessert will quickly become a go-to in your recipe rotation.
Don’t miss our easy apricot buckle recipe for another classic dump-and-bake treat that’s just as effortless.
PrintPineapple Dump Cake
Pineapple Dump Cake is a quick and easy dessert made with just 5 simple ingredients. It features a sweet, juicy pineapple base topped with buttery cake mix and optional crunchy toppings. Perfect for potlucks, holidays, or weeknight treats.
- Prep Time: 10 minutes
- Cook Time: 1 hour
- Total Time: 1 hour 10 minutes
- Yield: 8 servings
- Category: Dessert
- Method: Baking
- Cuisine: American
- Diet: Vegetarian
Ingredients
- 2 cans (20 oz) crushed pineapple, undrained
- 1 box (15.25 oz) yellow cake mix
- 1/2 cup brown sugar (optional)
- 1 cup chopped pecans (optional)
- 1 cup butter, melted
- Vanilla ice cream, for serving (optional)
Instructions
- Preheat oven to 350°F (175°C).
- Pour crushed pineapple with juice into a 9×13-inch baking dish and spread evenly.
- Sprinkle dry yellow cake mix evenly over the pineapple—do not stir.
- Top with chopped pecans and brown sugar if using.
- Drizzle melted butter evenly over the entire surface.
- Bake for 55 to 60 minutes, or until the top is golden and the edges are bubbling.
- Cool for 15–20 minutes before serving.
- Serve warm, optionally with vanilla ice cream.
Notes
- Do not drain the canned pineapple—the juice is essential for moisture.
- Melted butter spreads more evenly than slices for better topping texture.
- You can substitute yellow cake mix with white, spice, or butter pecan flavors.
- Store covered at room temperature for up to 2 days or refrigerate for up to 4 days.
- Freezes well for up to 3 months—wrap tightly in plastic and foil.


