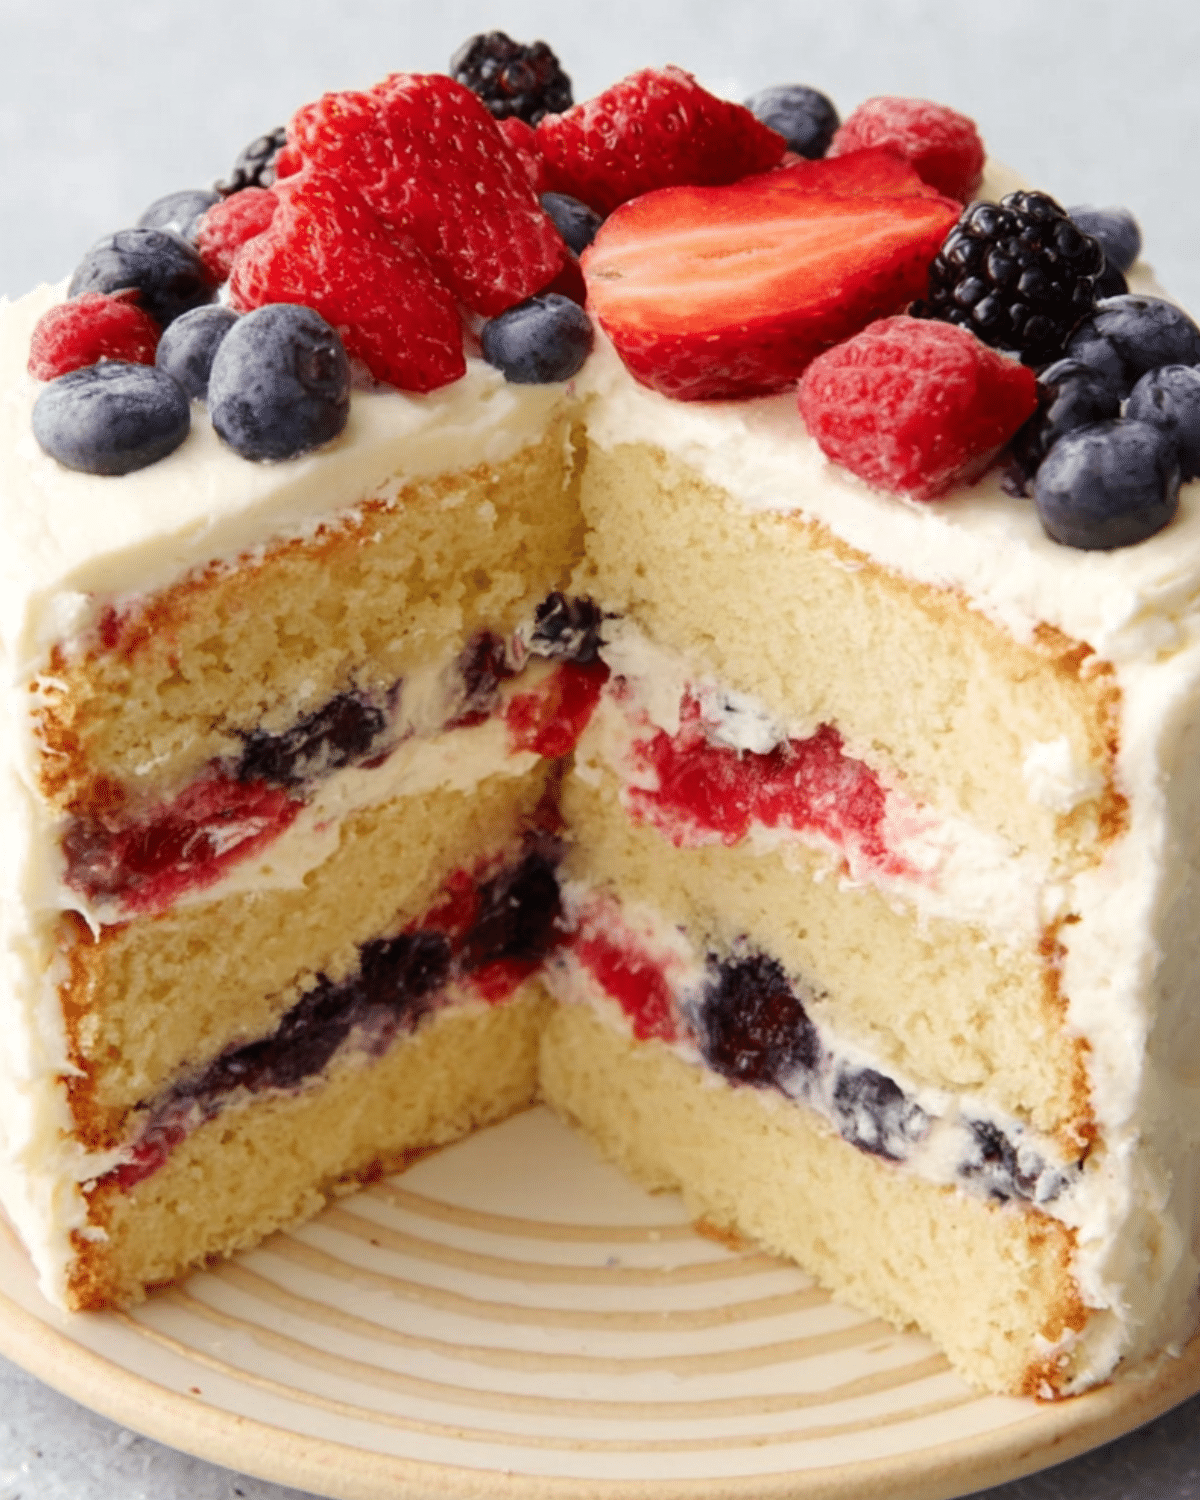
Easy Cannoli Cake brings the charm of a traditional Italian bakery into your kitchen with minimal effort. This cake combines all the classic flavors of a beloved cannoli—ricotta, mascarpone, orange zest, and chocolate chips—without requiring the tricky steps of filling crispy shells. It’s the kind of dessert that feels indulgent yet totally doable, even on a busy weekday.
Whether you’re celebrating a holiday, honoring a family tradition, or just need a slice of comfort, this cake delivers. With its creamy layers and nostalgic flavor, Easy Cannoli Cake is a dessert that feels personal and tastes like home.
JUMP TO
Table of Contents
Why You’ll Love This Easy Cannoli Cake
A Cannoli-Inspired Dessert Without the Fuss
You don’t need a deep fryer or pastry tubes to achieve that signature cannoli flavor. This cake simplifies the process while preserving the deliciousness of the original. Instead of wrapping ricotta filling in delicate shells, you’re layering it between moist vanilla cake for a more manageable, sliceable dessert.
Perfect for Celebrations and Make-Ahead Treats
Easy Cannoli Cake is a great option when you’re short on time but still want to impress. It holds up beautifully in the fridge, slices cleanly, and even tastes better after resting overnight. Whether it’s Easter brunch, a birthday gathering, or just a Sunday family dinner, this cake fits right in.
Ingredients You’ll Need for Easy Cannoli Cake
Each component has a purpose. Here’s a breakdown of what goes into the cake and why:
| Ingredient | Purpose / Function |
|---|---|
| Cake Mix or Homemade Vanilla Cake | Forms the soft, sturdy layers that hold the filling. |
| Ricotta Cheese | Adds signature creamy texture and mild tang. |
| Mascarpone Cheese | Provides extra richness and silkiness to the filling. |
| Powdered Sugar | Sweetens the filling while keeping it smooth. |
| Mini Chocolate Chips | Brings the iconic chocolate crunch. |
| Vanilla Extract | Enhances flavor with subtle warmth. |
| Orange Zest | Offers brightness and an authentic Italian touch. |
| Whipped Cream or Frosting | Optional for finishing the cake with elegance. |
| Crushed Cannoli Shells or Wafers | Optional crunch and decorative topping. |
How to Make Easy Cannoli Cake Step-by-Step
Step 1 – Bake the Cake Layers
Start with either a vanilla cake mix or your favorite from-scratch recipe. Bake the layers in round pans and let them cool completely before assembling. If using a mix, opt for one with a dense crumb to support the creamy filling.
Step 2 – Prepare the Cannoli Filling
While the cake layers are cooling, blend ricotta and mascarpone cheeses together until smooth. Add powdered sugar, vanilla extract, and orange zest. Fold in mini chocolate chips last to maintain their shape. Chill the mixture to allow it to firm up slightly—this makes spreading much easier.
Step 3 – Assemble the Cake
Place one cake layer on a serving plate and spread a generous amount of cannoli filling on top. Add the second layer and repeat. If desired, frost the top and sides with whipped cream or mascarpone frosting for a polished look. For a more rustic presentation, leave the sides unfrosted.
Step 4 – Chill and Set
Refrigerate the cake for at least 4 hours or overnight. This step is crucial for the flavors to meld and the filling to firm up. Just before serving, chill for 10 minutes to ensure the cleanest slices.

Pro Tips for the Best Easy Cannoli Cake
- Drain your ricotta well. Excess moisture will make the filling runny. Use a cheesecloth or fine strainer overnight.
- Use room temperature ingredients when mixing the filling for the creamiest texture.
- Don’t overmix the filling. Fold gently to keep it airy.
- Zest the orange lightly. Avoid the white pith, which is bitter.
- Decorate with crushed cannoli shells or chocolate chips for a festive finish.
Nutritional Info & Substitutions
This dessert is indulgent, but you can adapt it based on dietary needs:
| Nutrient | Approx. per Slice |
| Calories | 380 |
| Fat | 22g |
| Carbohydrates | 35g |
| Sugar | 24g |
| Protein | 7g |
Healthier Swaps:
- Use part-skim ricotta for lower fat
- Choose sugar-free cake mix or sweeteners
- Swap almond flour cake layers for gluten-free option
- Use dairy-free alternatives like coconut whipped topping and vegan ricotta
Fun Variations on Easy Cannoli Cake
- Chocolate Cannoli Cake: Use chocolate cake layers and dark chocolate chips.
- Cannoli Cupcakes: Bake cupcakes and fill the center with cannoli cream.
- Sheet Cake Version: Assemble and frost in a 9×13-inch pan.
- Pistachio Cannoli Cake: Add ground pistachios or pistachio extract to the filling.
- Holiday Cannoli Cake: Include cinnamon, nutmeg, or chopped candied orange.
Common Mistakes to Avoid
- Using wet ricotta: Always drain ricotta well for a thick filling.
- Skipping chill time: Refrigeration helps the cake set properly.
- Overloading filling: Spread evenly to prevent sliding layers.
- Not zesting fresh: Bottled zest lacks flavor; fresh is always better.
- Serving immediately: The cake needs time to develop flavor and texture.
FAQ – Easy Cannoli Cake
Can I make this cake ahead of time?
Yes! It actually tastes better when made a day in advance. Just store it in the fridge.
Do I need to cook the filling?
No cooking required. Just mix and chill.
Can I freeze Easy Cannoli Cake?
Freeze individual slices tightly wrapped for up to a month. Thaw overnight in the fridge.
What kind of cake works best?
Dense vanilla or butter cakes hold up better to the creamy filling. Avoid light, airy cakes.
Can I decorate it like a traditional cannoli?
Absolutely. Dust with powdered sugar or add a ring of mini chips around the edge.
Easy Cannoli Cake captures the spirit of Italian pastry without requiring advanced techniques. It’s creamy, lightly sweet, and packed with the familiar flavors of ricotta, orange zest, and chocolate. Best of all, it’s approachable enough for everyday bakers and impressive enough for special occasions.
So whether you’re honoring a family tradition or introducing new flavors to your dessert table, this cake is a guaranteed crowd-pleaser. Try it once, and it might just become your go-to celebration cake.
PrintThe Best Easy Cannoli Cake : 4 Steps

Easy Cannoli Cake is a simplified Italian-inspired dessert that layers creamy ricotta filling between soft vanilla cake, capturing classic cannoli flavors without the fuss.
- Prep Time: 25 minutes
- Cook Time: 30 minutes
- Total Time: 5 hours (including chilling)
- Yield: 12 slices 1x
- Category: Dessert
- Method: Baking
- Cuisine: Italian-American
- Diet: Vegetarian
Ingredients
- Vanilla Cake Mix or Homemade Vanilla Cake – provides a sturdy and soft base.
- Ricotta Cheese – delivers the signature creamy, tangy flavor of cannoli.
- Mascarpone Cheese – adds richness and smoothness to the filling.
- Powdered Sugar – sweetens the filling and maintains a silky texture.
- Mini Chocolate Chips – offer a delightful chocolate crunch.
- Vanilla Extract – enhances the filling’s flavor with warm, sweet notes.
- Orange Zest – brings brightness and a hint of citrus authenticity.
- Whipped Cream or Frosting – optional for finishing the cake elegantly.
- Crushed Cannoli Shells or Wafers – optional topping for crunch and decoration.
Instructions
- Bake the vanilla cake layers according to the recipe or box instructions. Let them cool completely.
- Mix ricotta and mascarpone cheese until smooth. Add powdered sugar, vanilla, and orange zest. Fold in mini chocolate chips.
- Spread cannoli filling over the first cake layer, then add the second layer and more filling on top. Frost if desired.
- Chill the assembled cake for at least 4 hours or overnight to set.
- Just before serving, chill for 10 minutes for clean slices. Garnish with toppings like cannoli shell crumbs or chocolate chips if preferred.
Notes
- Drain ricotta well before using to avoid a watery filling.
- Use room temperature dairy for best consistency.
- Gently fold ingredients to maintain a light texture.
- Zest the orange carefully to avoid bitterness.
- Make the cake a day ahead for best flavor and sliceability.
Nutrition
- Serving Size: 1 slice
- Calories: 380
- Sugar: 24g
- Sodium: 210mg
- Fat: 22g
- Saturated Fat: 12g
- Unsaturated Fat: 7g
- Trans Fat: 0g
- Carbohydrates: 35g
- Fiber: 1g
- Protein: 7g
- Cholesterol: 60mg