Mini Red Velvet Cheesecake is the perfect combination of elegance, flavor, and convenience. These bite-sized treats bring together the iconic red velvet flavor with a creamy cheesecake center that melts in your mouth. Whether you’re baking for Valentine’s Day, Christmas, or a casual get-together, these mini cheesecakes are guaranteed to impress guests and satisfy your sweet cravings. In this guide, you’ll learn everything from the essential ingredients to expert tips for getting the perfect texture and flavor every time. We’ll also cover the best storage methods and answer common baking questions to help you master this dessert like a pro.
JUMP TO
Table of Contents
What Makes Mini Red Velvet Cheesecake So Special
Mini cheesecakes have gained popularity for a reason—they combine flavor, visual appeal, and portion control into one easy-to-bake dessert. Mini Red Velvet Cheesecake elevates that experience with its rich cocoa notes, striking red color, and smooth cream cheese layer baked right in. Let’s explore what makes these treats truly irresistible.
The Perfect Combination of Brownie and Cheesecake Layers
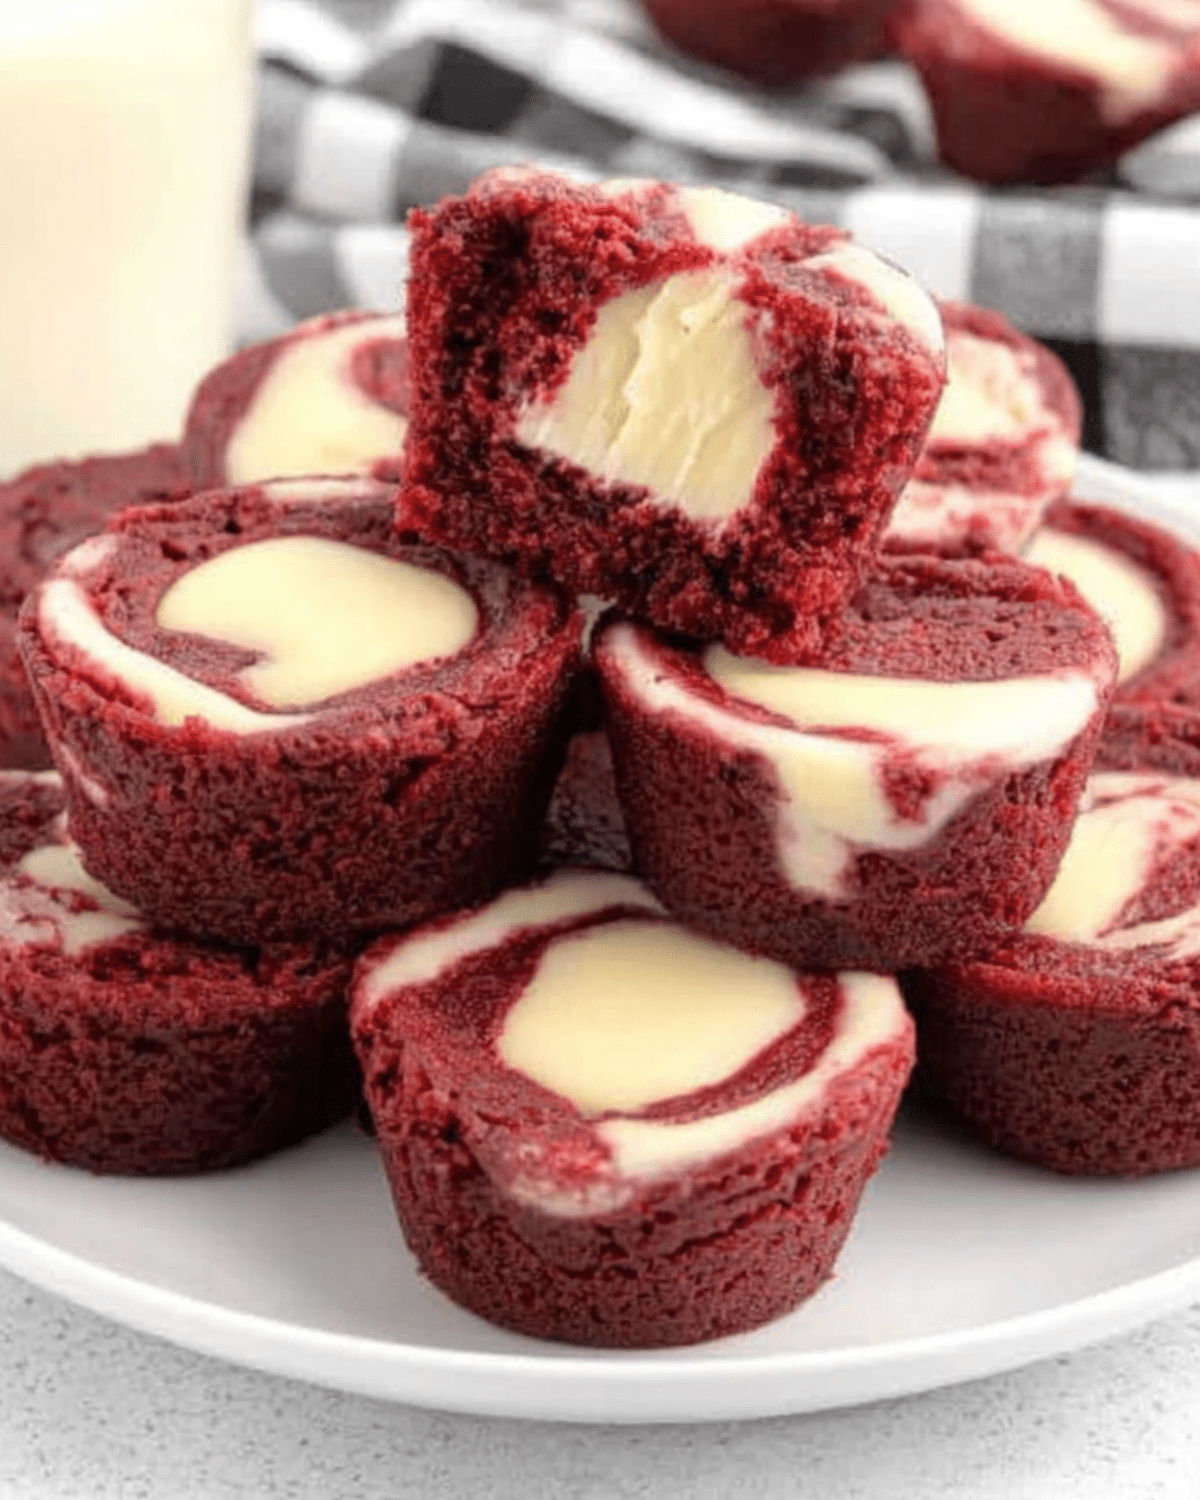
The heart of this recipe lies in its balance of textures. The base layer is made from a red velvet brownie batter, providing a chewy and slightly fudgy bite. On top sits a silky cheesecake filling that contrasts beautifully with the dense base. When baked, the flavors fuse together—offering the best of both worlds in one compact treat. You don’t need a springform pan or a water bath, which makes this dessert approachable even for beginner bakers.
Why Everyone Loves Mini Desserts
Mini desserts are not only adorable but practical. Their small size makes them ideal for serving at large gatherings, portioning for kids, or enjoying a guilt-free indulgence. Each bite delivers a perfect mix of red velvet and cheesecake flavors without the hassle of slicing or plating. They also bake faster than a full-sized cheesecake, so you can have fresh desserts ready in less than an hour. For home bakers short on time but big on flavor, this recipe delivers maximum satisfaction with minimal effort.
Ingredients You Need for Mini Red Velvet Cheesecake
Creating the best Mini Red Velvet Cheesecake starts with simple pantry staples. Each ingredient plays a key role in building that iconic red velvet flavor and smooth, creamy texture.

Red Velvet Base Ingredients
| Ingredient | Quantity | Purpose |
|---|---|---|
| All-purpose flour | 1 cup | Provides structure to the base |
| Unsweetened cocoa powder | ¼ cup + 1 tbsp | Adds the mild chocolate flavor |
| Salted sweet cream butter | ¾ cup, melted and cooled | Gives moisture and richness |
| Granulated sugar | 1¼ cups | Sweetens and balances the cocoa |
| Red gel food color | 1 tbsp | Gives the vibrant red color |
| Pure vanilla extract | 2 tsp | Enhances flavor depth |
| Eggs | 2 large, beaten | Adds structure and moisture |
This base forms the foundation of the dessert, offering a soft and chewy texture similar to brownies. The cocoa adds subtle chocolate notes, while the red food coloring provides that signature red velvet hue.
Creamy Cheesecake Filling
| Ingredient | Quantity | Purpose |
|---|---|---|
| Cream cheese | 8 oz, softened | The core of the filling; creamy and tangy |
| Granulated sugar | ¼ cup | Sweetens the cheesecake layer |
| Pure vanilla extract | 1 tsp | Balances tang with a light flavor |
| Egg yolk | 1 large | Helps the filling set smoothly |
The cream cheese mixture creates a luscious center that contrasts perfectly with the dense red velvet base. Ensure your cream cheese is at room temperature to prevent lumps and ensure a smooth blend.
Optional Add-ins and Substitutions
- Gluten-Free Option: Substitute all-purpose flour with a 1:1 gluten-free blend.
- Chocolate Lover’s Twist: Fold in mini chocolate chips into the cheesecake filling.
- No Food Coloring: Skip the dye for a natural, cocoa-brown dessert without losing flavor.
- Cream Cheese Frosting Top: Pipe on a swirl of frosting after baking for extra decadence.
These small changes let you personalize the dessert to fit any event or dietary need.
Step-by-Step Guide: How to Make Mini Red Velvet Cheesecakes
Making Mini Red Velvet Cheesecake is simple — no fancy equipment or water bath required. Here’s how to achieve that bakery-perfect texture and look every time.
Preparing the Batter and Filling
- Preheat your oven to 350°F (177°C) and lightly grease a mini muffin pan with nonstick spray.
- Mix Dry Ingredients: In one bowl, whisk together flour and cocoa powder until evenly combined.
- Mix Wet Ingredients: In another bowl, whisk melted butter, sugar, red food color, vanilla, and eggs until smooth.
- Combine: Slowly add dry ingredients to wet ingredients, stirring just until incorporated. Don’t overmix — it can make the texture dense.
- Make Cheesecake Filling: Beat softened cream cheese for 1 minute, then mix in sugar and vanilla. Add egg yolk and blend until smooth with no streaks.
Assembling and Baking
- Fill the Pans: Spoon 1 tablespoon of the red velvet base into each mini muffin cavity.
- Pipe Filling: Add 2 teaspoons of cheesecake filling into the center of each base.
- Bake: Bake for 8–9 minutes or until the edges are set and centers jiggle slightly.
- Cool: Let them cool in the pan for 20–30 minutes, then transfer to a wire rack to finish cooling.
This quick bake time ensures your cheesecake bites stay moist without drying out.
Pro Baking Tips for the Perfect Finish
- Always use room-temperature cream cheese to avoid lumps.
- Use a cookie scoop or piping bag for consistent portions.
- For decorative swirls, drag a toothpick gently through the filling before baking.
- Check for doneness early — ovens vary! The edges should be firm while the center stays soft.
- Avoid overbaking; they continue to firm as they cool.
Expert Tips and Common Mistakes to Avoid
Even though Mini Red Velvet Cheesecake is easy to make, small details can make a big difference in the final texture and flavor. Follow these professional baking insights to ensure success every time.
Ensuring Creamy Texture
For an ultra-smooth filling, always bring your cream cheese and eggs to room temperature before mixing. Cold ingredients tend to clump, resulting in uneven texture. If your batter looks lumpy, gently warm it over a bowl of hot water and mix again.
Getting the Right Bake
The secret to perfect mini cheesecakes lies in baking time control. Pull them out when the centers still have a slight jiggle; they’ll set as they cool. Overbaking can lead to dryness or cracks. Since every oven behaves differently, it’s best to test a batch and adjust accordingly.
Presentation and Serving Ideas
Mini Red Velvet Cheesecakes are versatile and elegant. Top them with a light dusting of cocoa powder, a swirl of whipped cream, or festive sprinkles for holidays. For a fancier touch, drizzle with melted white chocolate or decorate with fresh berries. Serve them chilled for the best flavor contrast between the creamy filling and dense base.
How to Store and Freeze Mini Cheesecakes
Refrigerator Storage Tips
Place cooled mini cheesecakes in an airtight container and refrigerate for up to 5 days. Layer parchment paper between tiers to prevent sticking. Always chill for at least an hour before serving for optimal texture.
Freezing for Long-Term Freshness
You can freeze them for up to 2 months. Arrange cooled cheesecakes on a baking sheet and freeze for 1 hour. Then transfer them into a freezer-safe bag or container. Thaw overnight in the refrigerator before serving — they’ll taste freshly baked.
Frequently Asked Questions About Mini Red Velvet Cheesecake
Can I make mini cheesecakes in advance?
Absolutely! You can bake them up to two days ahead. Store in the refrigerator and add toppings just before serving.
Can I use boxed brownie mix for the base?
Yes. Replace the homemade red velvet base with a boxed mix for convenience. Just reduce the baking time slightly to prevent overcooking.
How do I prevent cracking in the cheesecake?
Avoid overbaking and sudden temperature changes. Let them cool gradually in the pan before transferring to a wire rack.
Can I make them without food coloring?
Definitely. Omitting the food dye won’t change the flavor; you’ll just have a natural cocoa hue instead of bright red.
What’s the best way to store leftovers?
Keep them in the fridge in an airtight container. If you need to store longer, freeze them individually for easy grab-and-go desserts.
Conclusion
Mini Red Velvet Cheesecake is more than a dessert — it’s a statement of flavor and elegance in every bite. With a rich cocoa base, creamy cheesecake center, and vibrant color, these bite-sized treats are ideal for any celebration or cozy night in. They’re easy to bake, easy to share, and impossible to resist. Try pairing them with other mini desserts like Mini Oreo Cheesecake Bites or No-Bake Strawberry Cheesecake Cups from your site for a beautiful dessert spread.
PrintMini Red Velvet Cheesecake

Mini Red Velvet Cheesecake is a bite-sized dessert combining a chewy red velvet brownie base with a creamy cheesecake center. Perfect for holidays or parties, these mini cheesecakes are rich, moist, and easy to make in under an hour.
- Prep Time: 20 minutes
- Cook Time: 9 minutes
- Total Time: 59 minutes
- Yield: 42 mini cheesecakes 1x
- Category: Dessert
- Method: Baking
- Cuisine: American
- Diet: Vegetarian
Ingredients
- 1 cup all-purpose flour
- 1/4 cup + 1 tablespoon unsweetened cocoa powder
- 3/4 cup salted sweet cream butter, melted and cooled
- 1 1/4 cups granulated sugar
- 1 tablespoon red gel food color
- 2 teaspoons pure vanilla extract
- 2 large eggs, room temperature and beaten
- 8 ounces cream cheese, softened
- 1/4 cup granulated sugar (for filling)
- 1 teaspoon pure vanilla extract (for filling)
- 1 large egg yolk
Instructions
- Preheat the oven to 350°F (177°C) and spray a mini muffin pan with nonstick cooking spray.
- In a small bowl, whisk together flour and cocoa powder; set aside.
- In a separate bowl, whisk melted butter, sugar, red food color, vanilla extract, and eggs until smooth.
- Gradually add the dry mixture to the wet mixture and stir until combined without overmixing.
- In another bowl, beat cream cheese for 1 minute. Add sugar and vanilla and mix for 1–1½ minutes until smooth. Add egg yolk and blend until no yellow streaks remain.
- Add 1 tablespoon of the red velvet batter to each mini muffin cavity.
- Pipe or spoon about 2 teaspoons of cheesecake filling into the center of each base.
- Bake for 8–9 minutes, or until the edges are set and centers are slightly jiggly.
- Cool in the pan for 20–30 minutes, then transfer to a wire rack to cool completely before serving.
Notes
- Use room-temperature cream cheese for a smooth filling.
- Avoid overbaking to prevent dryness or cracks.
- Use a cookie scoop or piping bag for even portions.
- For decorative swirls, drag a toothpick through the filling before baking.
- These mini cheesecakes can be refrigerated for up to 5 days or frozen for up to 2 months.
Nutrition
- Serving Size: 1 mini cheesecake
- Calories: 93 kcal
- Sugar: 7 g
- Sodium: 46 mg
- Fat: 6 g
- Saturated Fat: 3 g
- Unsaturated Fat: 1.3 g
- Trans Fat: 0.1 g
- Carbohydrates: 10 g
- Fiber: 0.3 g
- Protein: 1 g
- Cholesterol: 27 mg