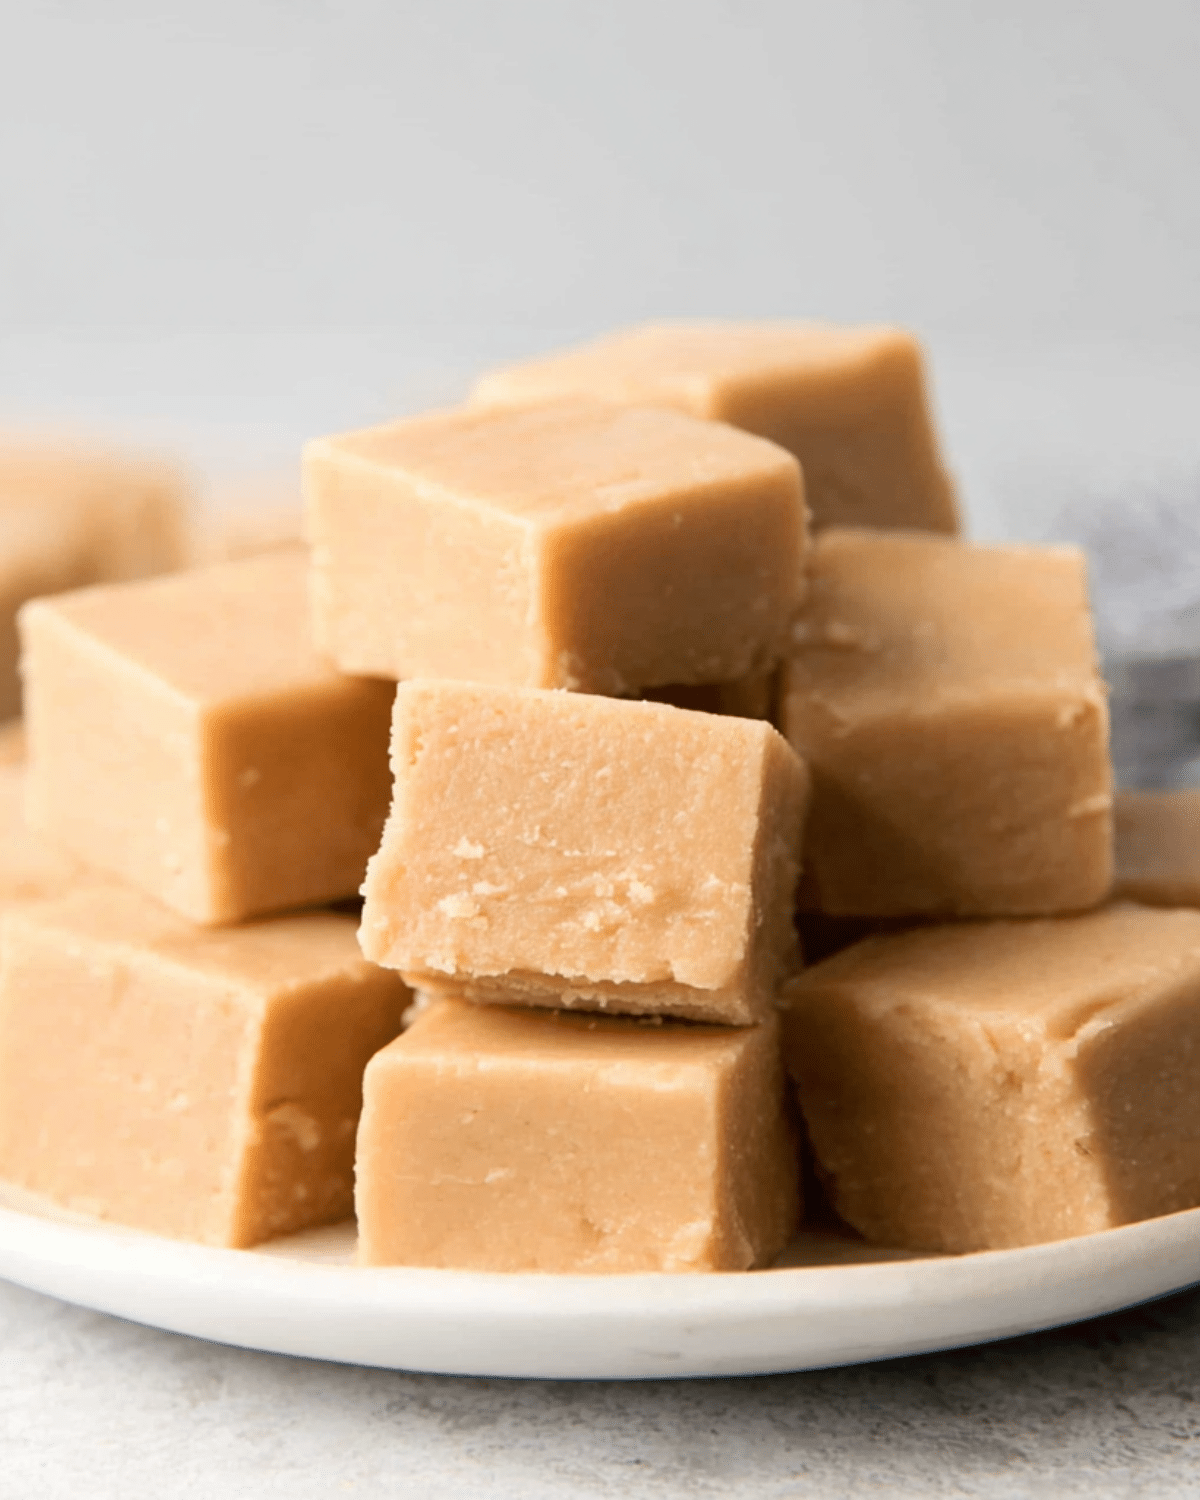
If you’re craving something rich, sweet, and sinfully smooth, this Peanut Butter Fudge is the no-fuss treat you’ve been searching for. With just four ingredients and a microwave, you can whip up a batch in under five minutes. Whether you’re prepping holiday goodies, surprising your family, or just treating yourself to a nostalgic classic, this recipe never fails. It’s easy enough for beginners and impressive enough to share. Discover great ideas like this dreamy peanut butter cheesecake that peanut butter lovers will also adore.
Let’s break down what makes this recipe a top-tier favorite and why it outshines other fudge methods.
JUMP TO
Table of Contents
What Makes This Peanut Butter Fudge So Irresistible
A No-Fail Fudge Everyone Can Make
Peanut butter fudge has a reputation for being tricky—but this version is foolproof. No candy thermometer, no boiling, no guesswork. Just simple steps that lead to melt-in-your-mouth results every time. This is the type of recipe you can make with kids or knock out just before guests arrive.
Quick Prep Time and Minimal Cleanup
In under 5 minutes, your mixture is ready to chill. There’s no stove to monitor or messy pots to scrub. All you need is a microwave-safe bowl and a spatula. For anyone juggling busy schedules, this dessert is a stress-free crowd-pleaser.
The Secret Behind Its Smooth, Creamy Texture
This peanut butter fudge stands out for its luxurious texture. The secret lies in using sifted powdered sugar and commercial creamy peanut butter, which prevent grittiness and ensure every bite is buttery smooth. Unlike older fudge recipes that turn out flaky or dry, this one sets perfectly every single time.
Key Ingredients That Make This Fudge Perfect

Why Commercial Peanut Butter Works Best
Natural peanut butter may be healthier, but it’s not ideal for fudge. It separates easily, leading to oily or uneven texture. Stick with trusted commercial brands like Jif or Skippy for reliable consistency and that classic rich peanut flavor.
The Role of Butter and Why Margarine Fails
Butter not only helps with flavor but also contributes to that creamy mouthfeel. Margarine or low-fat substitutes won’t hold the texture properly, often leaving your fudge too soft or rubbery. If you’re using salted butter, skip any added salt in the recipe.
Sifted Powdered Sugar: Your Texture Game-Changer
Sifting the sugar may seem like an extra step, but it’s worth it. It eliminates clumps, making the fudge smoother and easier to mix. The sugar balances out the peanut butter and helps the fudge firm up without becoming chalky.
Optional Add-Ins That Elevate Flavor
Feeling creative? Stir in chopped Reese’s Cups, peanuts, or chocolate chips for added crunch and flavor. Looking for inspiration? Try our Christmas fudge cake for more seasonal takes on rich, chocolatey treats.
Step-by-Step Instructions for Foolproof Peanut Butter Fudge
Prepping Your Pan the Right Way
Start with an 8×8-inch baking pan. Grease it with butter and line it with parchment paper, allowing two sides to hang over. This makes lifting and slicing the fudge a breeze after it sets.
Melting and Mixing in the Microwave
In a microwave-safe bowl, combine one cup of unsalted butter and one cup of creamy peanut butter. Microwave for about 3 minutes, until melted and bubbling. Stir well to combine. Add a teaspoon of vanilla and a pinch of salt if you’re not using salted butter.
Final Stir and Pour for a Perfect Finish
Next, stir in four cups of sifted confectioners’ sugar. The mixture will quickly thicken. Work fast to mix until smooth and free of white streaks. Pour it into the prepared pan and smooth the top. If you want a decorative swirl, use the back of a spoon.
Cooling and Cutting Without Cracks
Refrigerate the fudge for at least 4 hours until firm. Once set, lift it out using the parchment paper and slice into 1-inch squares. Don’t miss our festive cinnamon rolls for more make-ahead treats that wow at gatherings.
Creative Peanut Butter Fudge Variations to Try
Adding a twist to your peanut butter fudge is a fun way to personalize this classic treat. Whether you’re a chocolate lover or enjoy a little crunch, there’s a variation here for everyone.
Chocolate Swirl Peanut Butter Fudge
For a chocolatey upgrade, melt ¾ cup of chocolate chips and swirl them into the warm fudge mixture before chilling. Use a knife or toothpick to create marbled patterns on the surface. The result is a stunning two-tone dessert with rich flavor contrast.
Reese’s Candy Chunk Fudge
Chop up Reese’s Peanut Butter Cups and fold them into the warm fudge. The peanut butter-on-peanut butter combo is incredibly indulgent and a guaranteed hit at parties. Don’t miss our chocolate-covered cherry brownie bombs for another over-the-top dessert idea.
Butterfinger Twist and Crunchy Peanut Fudge
Add a candy bar crunch by mixing in chopped Butterfingers or roasted peanuts. This adds texture and balances the creamy base with just the right amount of bite. It’s an easy way to turn a simple recipe into something spectacular.
Storing and Freezing Your Fudge Like a Pro
One of the best things about peanut butter fudge is how well it stores. Whether you’re making it ahead for the holidays or stashing leftovers, here’s how to keep it fresh and flavorful.
How to Store It for Ultimate Freshness
Store fudge in an airtight container at room temperature for up to a week. If you prefer a firmer texture, you can refrigerate it for 2–3 weeks. Just remember to let it come to room temperature before serving so the texture returns to that soft, creamy bite.
Can You Freeze Peanut Butter Fudge?
Absolutely. To freeze, wrap the chilled fudge tightly in plastic wrap and place it in a zip-top freezer bag. It can stay frozen for up to 2 months. Thaw it overnight in the refrigerator, then let it sit at room temp before serving.
Tips for Bringing It Back to Creamy Perfection After Chilling
If your fudge feels a little too firm after refrigeration, let it rest on the counter for 30 minutes. You can also microwave individual squares for 5–10 seconds. The slight warmth brings back the melt-in-your-mouth texture without altering flavor.
Looking for another make-ahead dessert idea? Check out our cranberry white chocolate cheesecake for a holiday-friendly option with storage tips too.
Common Questions About Making Peanut Butter Fudge
These are some of the most frequently asked questions from home bakers trying their hand at fudge for the first time. Let’s clear up the confusion.
Why Didn’t My Fudge Set Properly?
In most cases, it’s either too much butter or not enough powdered sugar. Be sure to measure accurately. Also, make sure you’re using commercial peanut butter—not natural or homemade, which doesn’t set the same.
Can I Use Natural Peanut Butter?
Technically, yes—but it’s not recommended. Natural peanut butter separates, which affects both texture and firmness. You may also need to stir much longer to emulsify the mixture. For consistent results, stick with Skippy or Jif.
How Long Does Homemade Fudge Last?
At room temp in an airtight container, expect about 7 days of freshness. In the fridge, it’ll last up to 3 weeks. Frozen, it can be stored for 2 months. Always check for texture or smell changes if you’re unsure.
Discover more holiday dessert tips in our Christmas sprinkle buttermilk bread recipe, perfect for gifting and storage-friendly too.
FAQ:
What is the secret to good fudge?
The key is texture—and that comes down to ingredient ratios and mixing. Using sifted powdered sugar, high-quality butter, and creamy commercial peanut butter ensures your fudge is smooth, not gritty or oily.
Is fudge better with butter or margarine?
Butter is best. It brings the right richness and helps the fudge set correctly. Margarine may introduce excess moisture, leading to a soft or unstable consistency.
Can I make fudge without a thermometer?
Yes! This Peanut Butter Fudge recipe doesn’t require a thermometer or any stovetop boiling. It’s entirely microwave-based and beginner-friendly, making it ideal for no-fail results.
How do you fix crumbly peanut butter fudge?
If your fudge turns out dry or crumbly, try gently reheating it in the microwave with a tablespoon of butter, then stirring until smooth. However, prevention is key—always measure your sugar and peanut butter precisely.
Can I make this fudge without a microwave?
You can. Use a double boiler or a saucepan over low heat to melt the butter and peanut butter. Stir constantly to prevent scorching, then follow the same steps for mixing and setting.
Final Thoughts on Making the Best Peanut Butter Fudge
This Peanut Butter Fudge recipe proves that making decadent desserts doesn’t have to be complicated. With just four ingredients and a few minutes of prep, you’ll have a sweet treat that satisfies any peanut butter craving. Whether you’re gifting, celebrating, or indulging solo, this fudge never disappoints.
Don’t miss our dreamy cotton candy fudge for another creative twist on homemade fudge. And if you’re prepping ahead for the holidays, our Christmas popcorn candy is a colorful addition to any dessert table.
PrintPeanut Butter Fudge
This smooth and creamy peanut butter fudge is a no-bake, foolproof dessert made with just 4 ingredients in under 5 minutes. Perfect for holidays or a quick treat, it delivers rich peanut flavor and a melt-in-your-mouth texture.
- Prep Time: 2 minutes
- Cook Time: 3 minutes
- Total Time: 4 hours 5 minutes
- Yield: 64 1-inch pieces
- Category: Dessert
- Method: No-Bake, Microwave
- Cuisine: American
- Diet: Vegetarian
Ingredients
- 1 cup unsalted butter (2 sticks or 227g)
- 1 cup creamy peanut butter (260g)
- 1 teaspoon vanilla extract
- 4 cups sifted confectioners’ sugar (460g)
- 1/4 teaspoon salt (optional)
Instructions
- Butter an 8-inch square baking pan and line it with parchment paper, allowing two sides to hang over for easy removal.
- In a microwave-safe bowl, combine butter and peanut butter. Microwave for about 3 minutes until melted and bubbling. Stir to combine.
- Add vanilla and salt (if using), and stir well.
- Stir in the sifted powdered sugar until no white streaks remain and the mixture is smooth.
- Quickly pour into the prepared pan and smooth the top with a spatula or create a swirl pattern with the back of a spoon.
- Refrigerate for 4 hours until fully set.
- Lift the fudge out using parchment paper and cut into 1-inch squares. Serve at room temperature for best texture.
Notes
- Use commercial peanut butter like JIF or Skippy for best results.
- Don’t substitute margarine—it may affect texture and setting.
- Sift powdered sugar to avoid lumps and ensure a creamy finish.
- Let fudge come to room temperature before eating for ideal creaminess.
- For cleaner cuts, wipe the knife and dip it in hot water between slices.