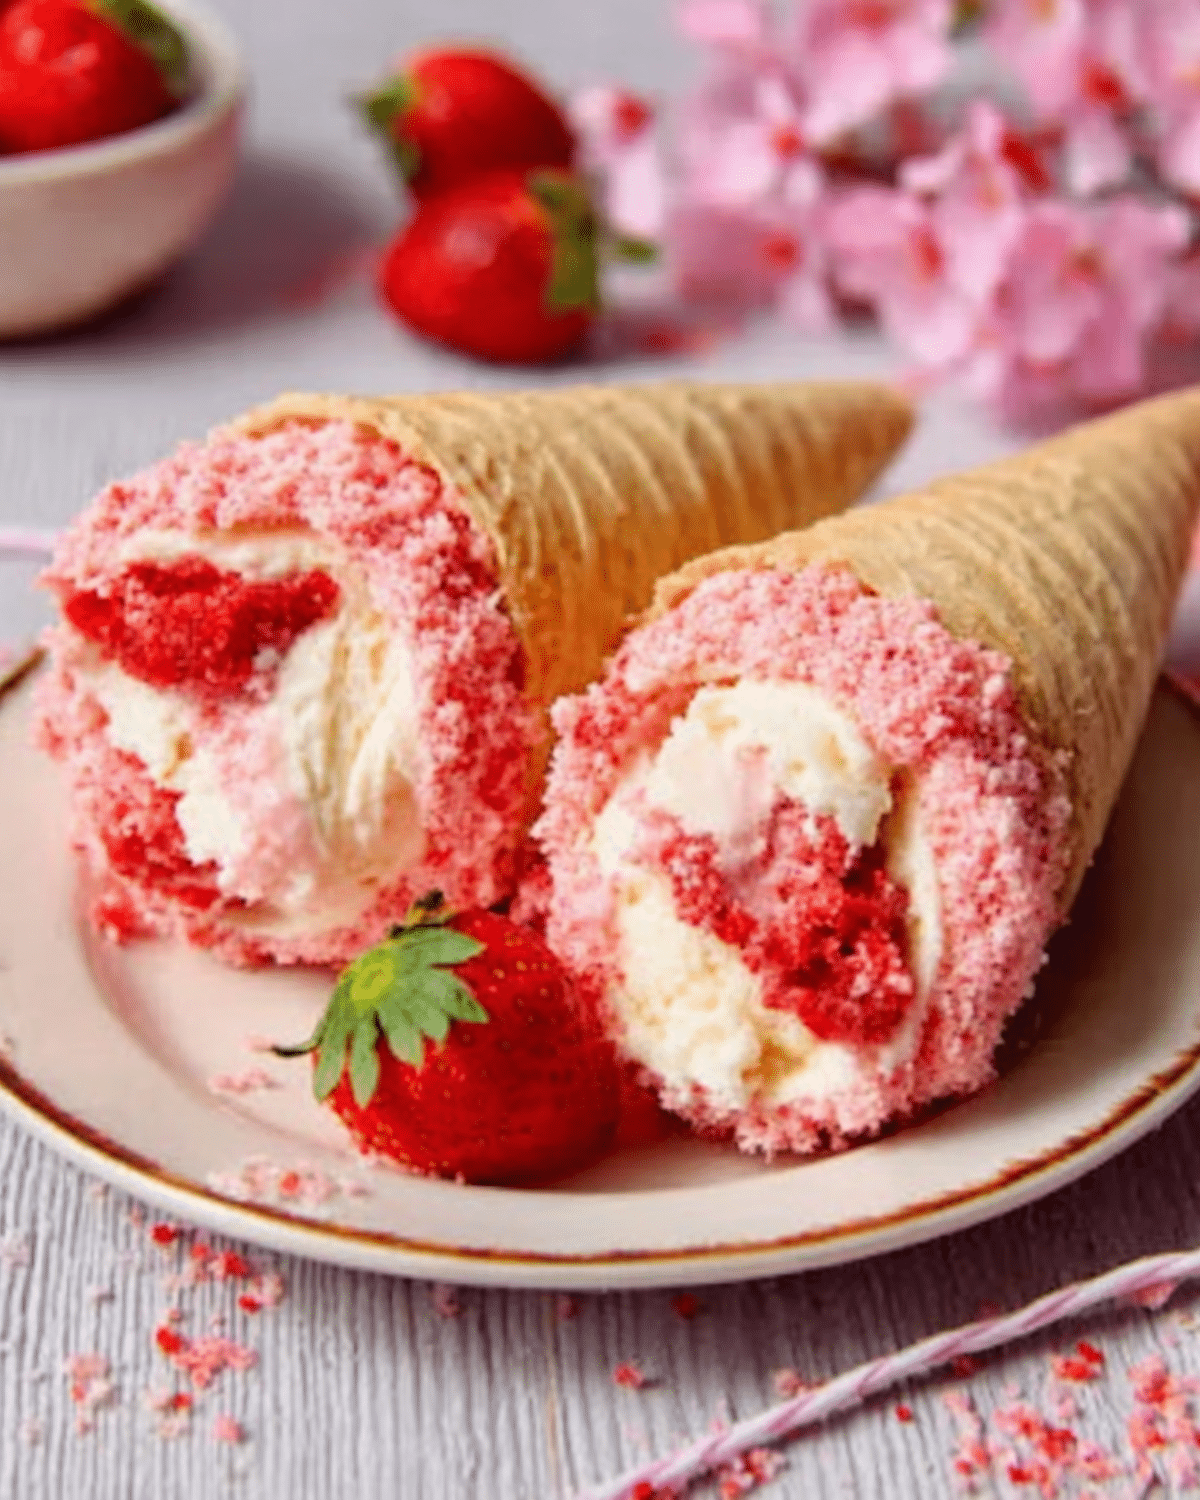
Strawberry Crunch Cheesecake Cones are one of the most exciting no-bake desserts you can make. They combine rich cheesecake filling, sweet strawberry flavor, buttery crunch topping, and crispy cones into one fun handheld treat. Every bite delivers smooth creamy texture, fruity sweetness, and crunchy cookie goodness. Because they are easy to prepare and beautiful to serve, these cones are perfect for birthdays, baby showers, holidays, summer parties, bake sales, and family dessert nights.
Many people love desserts that look impressive but require little effort. That is exactly why Strawberry Crunch Cheesecake Cones have become so popular. They feel like a bakery or ice cream shop specialty, yet they can be made right at home with simple ingredients.
Another reason these cones are such a favorite is versatility. You can prepare the filling ahead of time, decorate them in many creative ways, and customize flavors for different occasions. Whether you need a colorful summer dessert, a quick no-bake recipe, or a crowd-pleasing party treat, Strawberry Crunch Cheesecake Cones are always a winning choice.
In this complete guide, you will learn how to make the best Strawberry Crunch Cheesecake Cones, ingredient tips, expert techniques, step-by-step instructions, flavor variations, decorating ideas, storage methods, common mistakes to avoid, and answers to popular questions.
JUMP TO
Table of Contents
Why Strawberry Crunch Cheesecake Cones Are So Popular
Strawberry Crunch Cheesecake Cones continue to trend for many reasons.
First, they are no-bake, which makes them ideal for warm weather or quick dessert prep.
Second, they look amazing. The pink cheesecake filling, crunchy topping, and crisp cone create a colorful eye-catching dessert.
Third, they are portable. Since everything is served inside the cone, they are easy for guests to enjoy.
Fourth, they taste incredible. Creamy cheesecake paired with strawberry crunch is always delicious.
Fifth, they are fun for kids and adults alike.
Finally, they are highly customizable with toppings, sauces, and flavor changes.
Ingredients for the Best Strawberry Crunch Cheesecake Cones
Simple ingredients create bakery-style results.

Cheesecake Filling Ingredients
| Ingredient | Amount | Purpose |
|---|---|---|
| Cream cheese, softened | 8 ounces | Rich creamy base |
| Powdered sugar | 3/4 cup | Sweetness |
| Vanilla extract | 1 teaspoon | Flavor |
| Heavy whipping cream | 1 cup | Light fluffy texture |
| Strawberry gelatin powder | 3 tablespoons | Strawberry flavor and color |
| Fresh strawberries, diced | 1/2 cup | Fruit texture |
Crunch Topping Ingredients
| Ingredient | Amount | Purpose |
|---|---|---|
| Golden sandwich cookies | 12 cookies | Buttery crunch |
| Freeze-dried strawberries | 1/2 cup | Strong berry flavor |
| Melted butter | 3 tablespoons | Helps crumbs stick |
Cone and Decoration Ingredients
| Ingredient | Amount |
|---|---|
| Waffle cones or sugar cones | 8 cones |
| White chocolate, melted | 1/2 cup optional |
| Sprinkles | optional |
| Extra strawberries | for garnish |
Why Freeze-Dried Strawberries Are Best
Freeze-dried strawberries bring intense berry flavor without moisture. This keeps the crunch topping crisp and bright pink.
Fresh strawberries in the topping can make crumbs soggy, so freeze-dried fruit is the best choice.
Best Cones to Use
Waffle Cones
Best overall choice because they are sturdy and flavorful.
Sugar Cones
Great classic option with crisp texture.
Mini Cones
Perfect for parties, dessert trays, and children.
Chocolate Dipped Cones
Excellent for a richer dessert presentation.
How to Make Strawberry Crunch Cheesecake Cones Step by Step
Step 1: Make the Crunch Topping
Crush golden cookies into fine crumbs. Crush freeze-dried strawberries separately or together. Combine with melted butter until crumbly.
Step 2: Decorate Cone Rims
Dip the tops of cones into melted white chocolate. Then dip into the crunch topping. Set upright to harden.
Step 3: Beat the Cream Cheese
In a mixing bowl, beat softened cream cheese until smooth and creamy.
Step 4: Add Flavoring
Mix in powdered sugar, vanilla extract, and strawberry gelatin powder until fully combined.
Step 5: Whip the Cream
In another bowl, whip heavy cream until stiff peaks form.
Step 6: Fold Mixtures Together
Gently fold whipped cream into the strawberry cream cheese mixture until fluffy and smooth.
Step 7: Add Fresh Strawberries
Fold in diced strawberries carefully.
Step 8: Fill the Cones
Transfer filling into a piping bag and pipe into cones. You can also spoon it in.
Step 9: Add Crunch Topping
Top generously with remaining strawberry crunch crumbs.
Step 10: Chill and Serve
Refrigerate 20 to 30 minutes before serving for best texture.
Quick Time Guide
| Task | Time |
|---|---|
| Prep Time | 30 minutes |
| Chill Time | 30 minutes |
| Total Time | 60 minutes |
Expert Tips for the Best Strawberry Crunch Cheesecake Cones
Use Softened Cream Cheese
Cold cream cheese can leave lumps.
Whip Cream to Stiff Peaks
This creates stable fluffy filling.
Fill Close to Serving Time
Cones stay crisp longer if filled later.
Keep Topping Dry
Moisture softens crumbs quickly.
Use a Piping Bag
This gives cleaner presentation and prettier swirls.
Chill Before Serving
Cold filling tastes richer and holds shape better.
Easy Variations of Strawberry Crunch Cheesecake Cones
Chocolate Strawberry Cones
Drizzle melted chocolate over the top.
Oreo Strawberry Version
Use crushed chocolate sandwich cookies instead of golden cookies.
Mixed Berry Cheesecake Cones
Use blueberries or raspberries with strawberries.
Lemon Strawberry Cheesecake Cones
Add lemon zest to brighten flavor.
Mini Party Cones
Use mini cones for bite-sized desserts.
Banana Strawberry Cones
Add sliced bananas just before serving.
Cheesecake Cups
Skip cones and layer ingredients in jars or dessert cups.
Decorating Ideas for Parties
These cones look even more impressive with simple finishing touches.
Birthday Parties
Use rainbow sprinkles.
Baby Showers
Use pastel candy toppings.
Valentine’s Day
Add heart sprinkles and chocolate drizzle.
Summer Parties
Top with fresh sliced berries.
Holiday Dessert Tables
Use colored sugar and themed sprinkles.
What to Serve with Strawberry Crunch Cheesecake Cones
| Pairing | Why It Works |
|---|---|
| Iced coffee | Rich flavor contrast |
| Lemonade | Refreshing balance |
| Fruit tray | Light fresh side |
| Milkshakes | Extra indulgence |
| Party punch | Great for gatherings |
| Hot chocolate | Cozy dessert option |
How to Store Strawberry Crunch Cheesecake Cones
Refrigerator
Store filled cones for up to 1 day, though best eaten fresh.
Best Make-Ahead Method
Prepare filling and topping separately for up to 2 days. Fill cones before serving.
Freezer
Freeze cheesecake filling only. Do not freeze assembled cones.
Transport Tip
Carry cones upright in cups or a tray with holes to prevent tipping.
Common Mistakes to Avoid
Using Cold Cream Cheese
Creates lumpy filling.
Overmixing Whipped Cream
Can deflate the airy texture.
Filling Too Early
Cones may lose crispness.
Wet Fresh Strawberries
Always dry berries well before mixing in.
Too Much Filling
Overfilled cones can become messy.
FAQ About Strawberry Crunch Cheesecake Cones
Can I make Strawberry Crunch Cheesecake Cones ahead of time?
Yes. Make the filling and topping early, then assemble before serving.
What cones work best?
Waffle cones are usually the best because they are sturdy.
Can I use whipped topping instead of heavy cream?
Yes, though fresh whipped cream gives better flavor.
How long do they last?
Best same day, up to 1 day chilled.
Conclusion
Strawberry Crunch Cheesecake Cones are creamy, crunchy, fruity, and incredibly fun to serve. They combine the richness of cheesecake with the nostalgic flavor of strawberry crunch topping and the crispy texture of cones. Because they are easy, colorful, and crowd pleasing, they are a dessert recipe worth making often.
Whether you serve them at birthdays, summer cookouts, baby showers, holidays, or weekend dessert nights, these Strawberry Crunch Cheesecake Cones are guaranteed to impress and disappear fast.
PrintStrawberry Crunch Cheesecake Cones: Best No-Bake Recipe

Strawberry Crunch Cheesecake Cones are creamy no-bake desserts made with strawberry cheesecake filling, buttery crunch topping, and crispy waffle cones. Perfect for birthdays, summer parties, baby showers, holidays, and fun family treats.
- Prep Time: 30 minutes
- Cook Time: 0 minutes
- Total Time: 60 minutes
- Yield: 8 cones 1x
- Category: Dessert
Ingredients
- 8 ounces cream cheese, softened
- 3/4 cup powdered sugar
- 1 teaspoon vanilla extract
- 1 cup heavy whipping cream
- 3 tablespoons strawberry gelatin powder
- 1/2 cup fresh strawberries, diced
- 12 golden sandwich cookies, crushed
- 1/2 cup freeze-dried strawberries, crushed
- 3 tablespoons melted butter
- 8 waffle cones or sugar cones
- 1/2 cup melted white chocolate (optional)
- Sprinkles optional
- Extra strawberries for garnish optional
Instructions
- Crush cookies and freeze-dried strawberries into crumbs.
- Mix crumbs with melted butter until crumbly.
- Dip cone rims in melted white chocolate and coat with crumbs if desired.
- Beat softened cream cheese until smooth.
- Add powdered sugar, vanilla, and strawberry gelatin powder.
- Whip heavy cream to stiff peaks in a separate bowl.
- Fold whipped cream into cream cheese mixture until fluffy.
- Fold in diced strawberries gently.
- Pipe or spoon filling into cones.
- Top with remaining strawberry crunch crumbs.
- Chill 20 to 30 minutes before serving.
- Garnish with extra strawberries if desired.
Notes
- Use softened cream cheese for smooth filling.
- Fill cones close to serving time for best crunch.
- Use a piping bag for cleaner presentation.
- Store filling separately if making ahead.
- Best enjoyed same day.
- Dry strawberries well before adding.
- Mini cones are great for parties.
- Freeze filling only, not assembled cones.
Nutrition
- Serving Size: 1 cone
- Calories: 435
- Sugar: 31g
- Sodium: 245mg
- Fat: 27g
- Saturated Fat: 16g
- Unsaturated Fat: 9g
- Trans Fat: 0g
- Carbohydrates: 45g
- Fiber: 1g
- Protein: 5g
- Cholesterol: 70mg