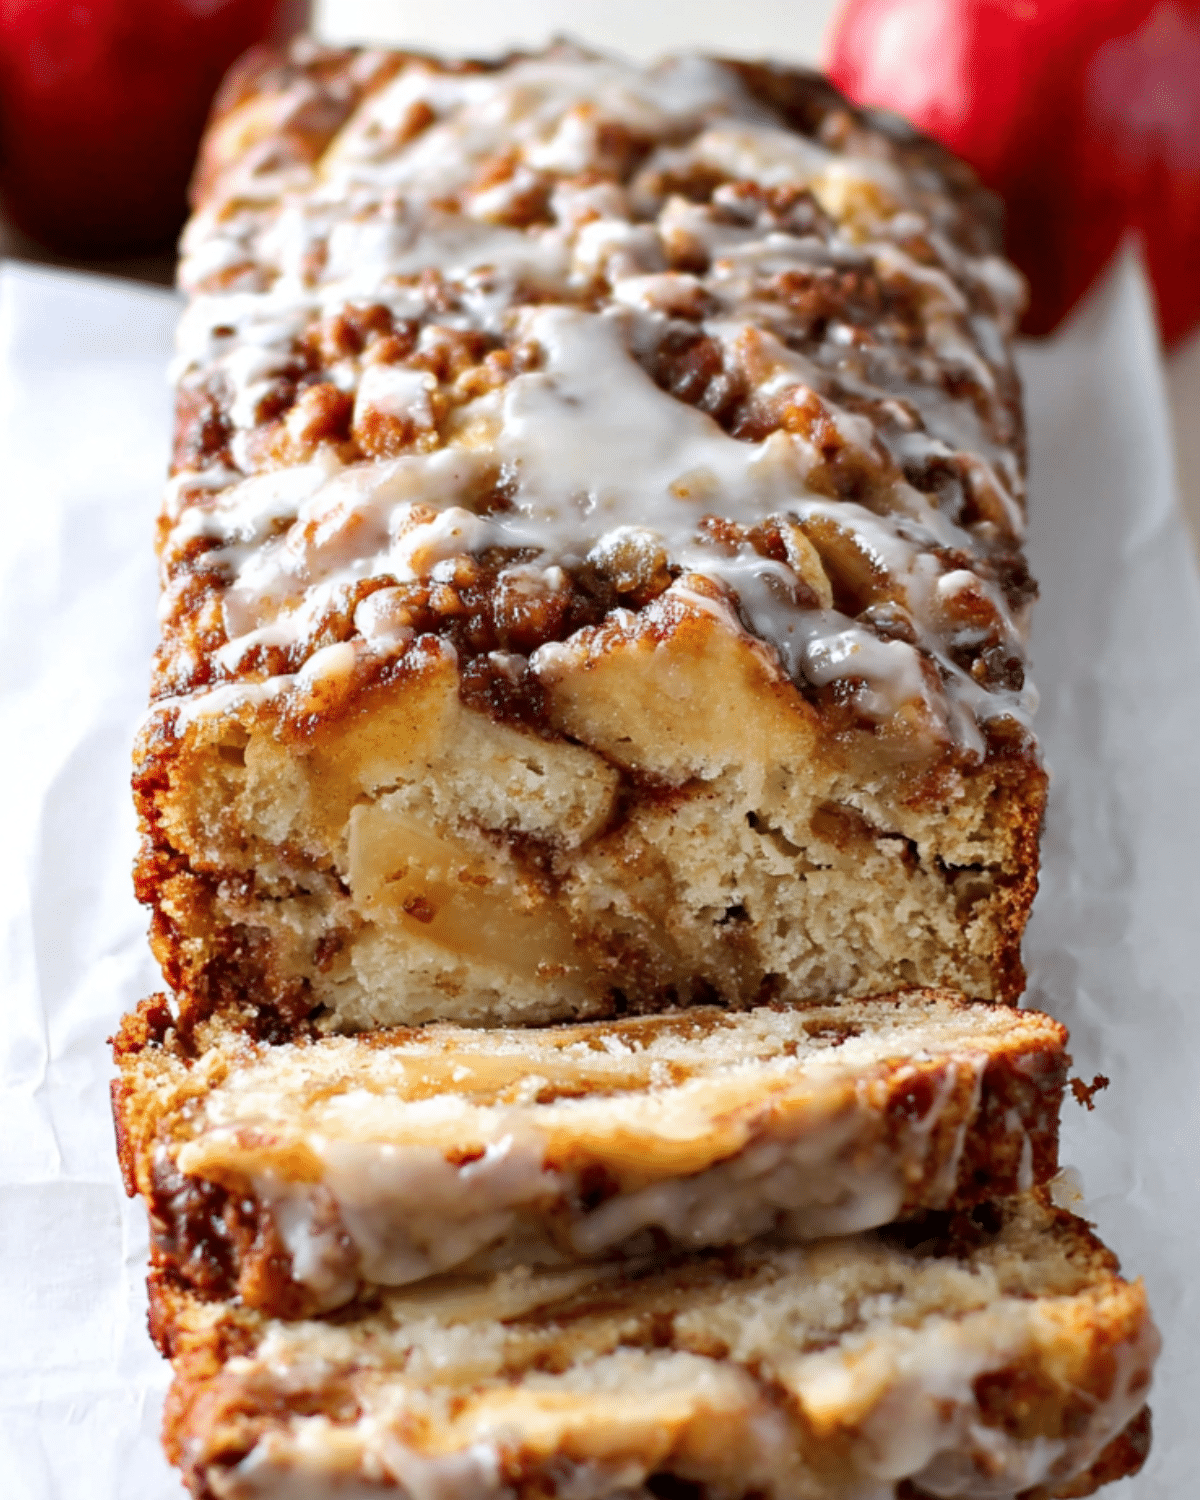
Nothing says comfort quite like the aroma of fresh apples, cinnamon, and buttery bread baking in the oven. This Amish Apple Fritter Bread combines everything you love about a classic apple fritter with the simplicity of a homemade quick bread. Every slice is filled with tender apples, rich cinnamon sugar, and a moist vanilla-flavored loaf that’s finished with a sweet glaze for the perfect bakery-style treat.
Unlike traditional apple fritters that require frying, this recipe is baked until golden brown, making it easier to prepare while still delivering incredible flavor and texture. The layers of cinnamon-coated apples create beautiful ribbons throughout the bread, while the glaze adds just the right amount of sweetness.
Whether you’re baking during apple season, preparing breakfast for guests, or looking for a cozy afternoon snack with coffee, Amish Apple Fritter Bread is always a wonderful choice. It’s beginner-friendly, freezer-friendly, and made with simple ingredients you probably already have in your kitchen.
JUMP TO
Table of Contents
Amish Apple Fritter Bread
Why You’ll Love This Amish Apple Fritter Bread
There are countless reasons why this recipe has become a favorite among home bakers.
The bread is incredibly soft and moist, thanks to the buttery batter and juicy apples. Every bite delivers warm cinnamon flavor balanced by sweet vanilla glaze. Since it doesn’t require yeast, kneading, or frying, it’s much easier than traditional apple fritters while providing the same comforting flavors.
This recipe is also perfect for meal prep because it stays moist for several days and freezes beautifully.
Recipe Highlights
| Feature | Why You’ll Love It |
|---|---|
| Easy to make | No yeast or frying required |
| Soft and moist | Tender crumb filled with apples |
| Loaded with cinnamon | Warm fall flavors in every bite |
| Bakery-style glaze | Sweet finishing touch |
| Freezer-friendly | Great for make-ahead baking |
| Perfect anytime | Breakfast, snack, or dessert |
What Is Amish Apple Fritter Bread?
Amish Apple Fritter Bread is a sweet quick bread inspired by the flavors of old-fashioned apple fritters. Instead of making fried dough, this recipe layers vanilla batter with cinnamon-sugar apples before baking everything into a soft loaf.
As the bread bakes, the apples become perfectly tender while the cinnamon sugar melts into the batter, creating beautiful swirls of flavor. Once cooled, the loaf is topped with a simple vanilla glaze that adds just enough sweetness without overpowering the apples.
The finished bread tastes like a cross between apple cake, cinnamon bread, and a classic bakery apple fritter.
Why This Recipe Works
This recipe succeeds because every ingredient plays an important role.
Butter provides a rich flavor while helping create a soft crumb.
Fresh apples release moisture during baking, keeping the loaf tender without becoming soggy.
Brown sugar caramelizes slightly around the apples, creating delicious pockets of sweetness.
Ground cinnamon ties all the flavors together and gives the bread its signature aroma.
Finally, the vanilla glaze creates a beautiful finish that makes every slice look bakery-worthy.
Ingredients You’ll Need
For the Bread
- 2 cups all-purpose flour
- 2 teaspoons baking powder
- ½ teaspoon salt
- ½ cup unsalted butter, softened
- ⅔ cup granulated sugar
- 2 large eggs
- 1½ teaspoons vanilla extract
- ½ cup whole milk
Apple Mixture
- 2 medium apples, peeled and diced
- ⅓ cup brown sugar
- 1 teaspoon ground cinnamon
Cinnamon Swirl
- ⅓ cup brown sugar
- 1 teaspoon ground cinnamon
Vanilla Glaze
- 1 cup powdered sugar
- 2–3 tablespoons milk
- ½ teaspoon vanilla extract
Choosing the Best Apples
Selecting the right apples makes a huge difference in the final loaf.
The best apples remain slightly firm while baking.
Excellent choices include:
- Honeycrisp
- Granny Smith
- Fuji
- Gala
- Pink Lady
- Braeburn
- Jonagold
Granny Smith apples provide a tart contrast to the sweet batter, while Honeycrisp and Fuji produce naturally sweeter bread.
Avoid overly soft apples because they can become mushy during baking.
Kitchen Equipment
You’ll need only a few basic kitchen tools.
- Mixing bowls
- Electric mixer
- Measuring cups
- Measuring spoons
- Rubber spatula
- Whisk
- Cooling rack
- 9×5-inch loaf pan
- Sharp knife
- Cutting board
Step-by-Step Instructions
Step 1: Prepare the Pan
Preheat the oven to 350°F (175°C).
Grease and lightly flour a loaf pan.
Step 2: Prepare the Apples
Peel and dice the apples into small cubes.
Mix them with brown sugar and cinnamon until evenly coated.
Set aside.
Step 3: Mix the Dry Ingredients
Whisk together the flour, baking powder, and salt.
This ensures even distribution of the leavening.
Step 4: Cream the Butter and Sugar
Beat the softened butter with the granulated sugar until light and fluffy.
This incorporates air into the batter, helping create a tender loaf.
Step 5: Add Eggs and Vanilla
Mix in the eggs one at a time.
Add the vanilla extract.
Continue beating until smooth.
Step 6: Finish the Batter
Alternate adding the flour mixture and milk.
Mix gently after each addition.
Stop mixing once everything is combined.
Step 7: Assemble the Layers
Spread half of the batter into the loaf pan.
Top with half of the apple mixture.
Sprinkle with half of the cinnamon sugar.
Repeat the layers.
Use a butter knife to gently swirl the batter.
Don’t over-swirl, or the beautiful layers may disappear.
Step 8: Bake
Bake for 50–60 minutes.
Check with a toothpick inserted into the center.
If it comes out clean or with only a few moist crumbs, the bread is finished.
Step 9: Cool
Cool inside the pan for 15 minutes.
Transfer to a wire rack.
Allow to cool completely.
Step 10: Add the Glaze
Whisk powdered sugar, milk, and vanilla until smooth.
Drizzle generously over the cooled loaf.
Allow the glaze to set before slicing.
Expert Baking Tips
Measure Flour Properly
Too much flour creates dry bread.
Spoon flour into the measuring cup instead of scooping directly from the bag.
Use Room Temperature Ingredients
Room temperature butter, eggs, and milk combine much more smoothly.
Dice Apples Evenly
Even apple pieces bake consistently throughout the loaf.
Avoid Overmixing
Mix only until the flour disappears.
Overmixing develops gluten, making the bread tougher.
Protect the Top
If the loaf browns too quickly, loosely cover it with aluminum foil during the last 15 minutes.
Ingredient Substitutions

You can easily customize this recipe.
| Ingredient | Substitute |
|---|---|
| Whole milk | 2% milk |
| Butter | Unsalted margarine |
| Brown sugar | Coconut sugar |
| Vanilla | Maple extract |
| Apples | Pears |
| All-purpose flour | 1:1 gluten-free flour blend |
Delicious Variations
This recipe is easy to customize depending on your preferences.
Caramel Apple Bread
Drizzle warm caramel sauce over the glaze.
Nutty Apple Bread
Add chopped walnuts or pecans.
Apple Raisin Bread
Mix raisins into the apple filling.
Maple Glaze
Replace vanilla with maple extract in the glaze.
Extra Cinnamon
Increase the cinnamon for an even warmer spice flavor.
Streusel Topping
Sprinkle butter, brown sugar, flour, and cinnamon over the batter before baking.
What to Serve with Amish Apple Fritter Bread
Although delicious by itself, this bread pairs wonderfully with many breakfast and dessert favorites.
Serve alongside:
- Coffee
- Tea
- Apple cider
- Hot chocolate
- Fresh fruit
- Greek yogurt
- Vanilla ice cream
- Whipped cream
- Bacon
- Breakfast sausage
It’s equally delicious warm or at room temperature.
Make-Ahead Tips
Amish Apple Fritter Bread is an excellent make-ahead recipe.
Bake the loaf the day before serving.
Wait until serving day to drizzle the glaze for the freshest presentation.
You can also prepare the dry ingredients ahead of time to make baking even quicker.
Storage Instructions
Store the cooled loaf inside an airtight container.
Room temperature: Up to 3 days.
Refrigerator: Up to 1 week.
For the best texture, allow refrigerated slices to come to room temperature before serving or warm them slightly.
Freezing Instructions
Wrap the cooled loaf tightly in plastic wrap.
Add a layer of aluminum foil.
Freeze for up to three months.
Thaw overnight before glazing or serving.
Individual slices can also be frozen for quick breakfasts.
Common Mistakes to Avoid
- Using overly ripe apples
- Overmixing the batter
- Skipping the cinnamon swirl
- Slicing while still hot
- Overbaking
- Measuring flour incorrectly
- Adding glaze before cooling
Nutritional Benefits
Although Amish Apple Fritter Bread is a sweet treat, it also includes fresh apples that provide dietary fiber, vitamin C, and antioxidants. Baking instead of frying keeps the recipe lighter than traditional apple fritters while still delivering rich flavor. Preparing the bread at home also allows you to adjust the sweetness, choose high-quality ingredients, and customize the recipe with nutritious additions like chopped nuts or whole-grain flour.
Frequently Asked Questions
Can I make Amish Apple Fritter Bread ahead of time?
Yes. It actually tastes even better the following day after the flavors have blended.
What apples are best?
Honeycrisp, Granny Smith, Fuji, Gala, Pink Lady, and Braeburn all bake beautifully.
Can I freeze it?
Absolutely. Wrap tightly and freeze for up to three months.
Why did my bread sink?
Opening the oven too early or underbaking can cause the center to collapse.
Conclusion
This Amish Apple Fritter Bread is the perfect homemade treat for anyone who loves warm cinnamon, juicy apples, and soft, buttery quick bread. Every slice is layered with fresh apple filling, cinnamon sugar, and finished with a sweet vanilla glaze that tastes just like a bakery favorite. Whether you’re baking for breakfast, brunch, dessert, or sharing with family and friends, this easy recipe delivers comforting flavor in every bite and is sure to become one of your favorite apple recipes.
PrintAmish Apple Fritter Bread: Easy, Moist & Bakery-Style Recipe

Amish Apple Fritter Bread is a soft, buttery quick bread layered with cinnamon-sugar apples and finished with a sweet vanilla glaze. This easy homemade loaf is perfect for breakfast, brunch, dessert, or a cozy afternoon snack.
- Prep Time: 20 minutes
- Cook Time: 55 minutes
- Total Time: 1 hour 15 minutes
- Yield: 10 slices 1x
- Category: Breakfast
- Method: Baking
Ingredients
- 2 cups all-purpose flour
- 2 teaspoons baking powder
- 1/2 teaspoon salt
- 1/2 cup unsalted butter, softened
- 2/3 cup granulated sugar
- 2 large eggs
- 1 1/2 teaspoons vanilla extract
- 1/2 cup whole milk
- 2 medium apples, peeled and diced
- 2/3 cup brown sugar, divided
- 2 teaspoons ground cinnamon, divided
- 1 cup powdered sugar
- 2 to 3 tablespoons milk (for glaze)
- 1/2 teaspoon vanilla extract (for glaze)
Instructions
- Preheat the oven to 350°F (175°C) and grease a 9×5-inch loaf pan.
- Combine the diced apples with 1/3 cup brown sugar and 1 teaspoon cinnamon.
- Whisk together the flour, baking powder, and salt.
- Cream the butter and granulated sugar until light and fluffy.
- Add the eggs one at a time, then mix in the vanilla extract.
- Alternate adding the flour mixture and milk, mixing until just combined.
- Spread half the batter into the loaf pan.
- Layer with half of the apple mixture and half of the remaining cinnamon sugar.
- Repeat the layers with the remaining batter, apples, and cinnamon sugar, then swirl gently with a knife.
- Bake for 50 to 60 minutes or until a toothpick inserted in the center comes out clean.
- Cool the bread in the pan for 15 minutes before transferring to a wire rack.
- Whisk together the glaze ingredients and drizzle over the cooled loaf before slicing.
Notes
- Use firm apples such as Honeycrisp or Granny Smith.
- Measure flour correctly to keep the bread light and tender.
- Do not overmix the batter.
- If the top browns too quickly, loosely cover with foil during the final 15 minutes of baking.
- Cool completely before adding the glaze.
- Store at room temperature for up to 3 days or refrigerate for up to 1 week.
- Freeze for up to 3 months.
Nutrition
- Serving Size: 1 slice
- Calories: 315
- Sugar: 25g
- Sodium: 180mg
- Fat: 11g
- Saturated Fat: 7g
- Unsaturated Fat: 3g
- Trans Fat: 0g
- Carbohydrates: 50g
- Fiber: 2g
- Protein: 4g
- Cholesterol: 58mg