If you’re looking for a nostalgic homemade candy that’s colorful, flavorful, and surprisingly simple to prepare, this Hard Tack Candy Easy Recipe is exactly what you need. Often called old-fashioned hard candy, Christmas candy, or glass candy, this timeless recipe has been a favorite for generations. Made with just a handful of pantry staples, it produces glossy, crunchy candies that can be customized with your favorite flavors and colors.
Whether you’re making holiday gifts, filling candy jars, or simply satisfying your sweet tooth, homemade hard tack candy is always a fun project. With endless flavor possibilities—from peppermint and cinnamon to cherry, lemon, and watermelon—you can easily create unique batches for every season or celebration.
One of the best things about this recipe is its versatility. Once you master the basic method, you can experiment with extracts, food coloring, and decorations to create your own signature candies. Although candy making may seem intimidating at first, following the correct temperature and using a reliable candy thermometer makes the process much easier.
JUMP TO
Table of Contents
Hard Tack Candy Easy Recipe
Why You’ll Love This Hard Tack Candy Easy Recipe
This classic candy recipe has remained popular for decades because it’s easy, affordable, and incredibly versatile.
Unlike many homemade desserts that require special equipment or complicated techniques, this recipe uses only a few basic ingredients and produces beautiful results every time.
Here are several reasons to make it:
| Feature | Benefit |
|---|---|
| Simple ingredients | Pantry staples |
| Easy to customize | Endless flavor options |
| Perfect for holidays | Great homemade gifts |
| Long shelf life | Stores well |
| Colorful presentation | Beautiful candy jars |
| Budget-friendly | Makes a large batch |
The shiny appearance and satisfying crunch make these candies look just as impressive as store-bought versions.
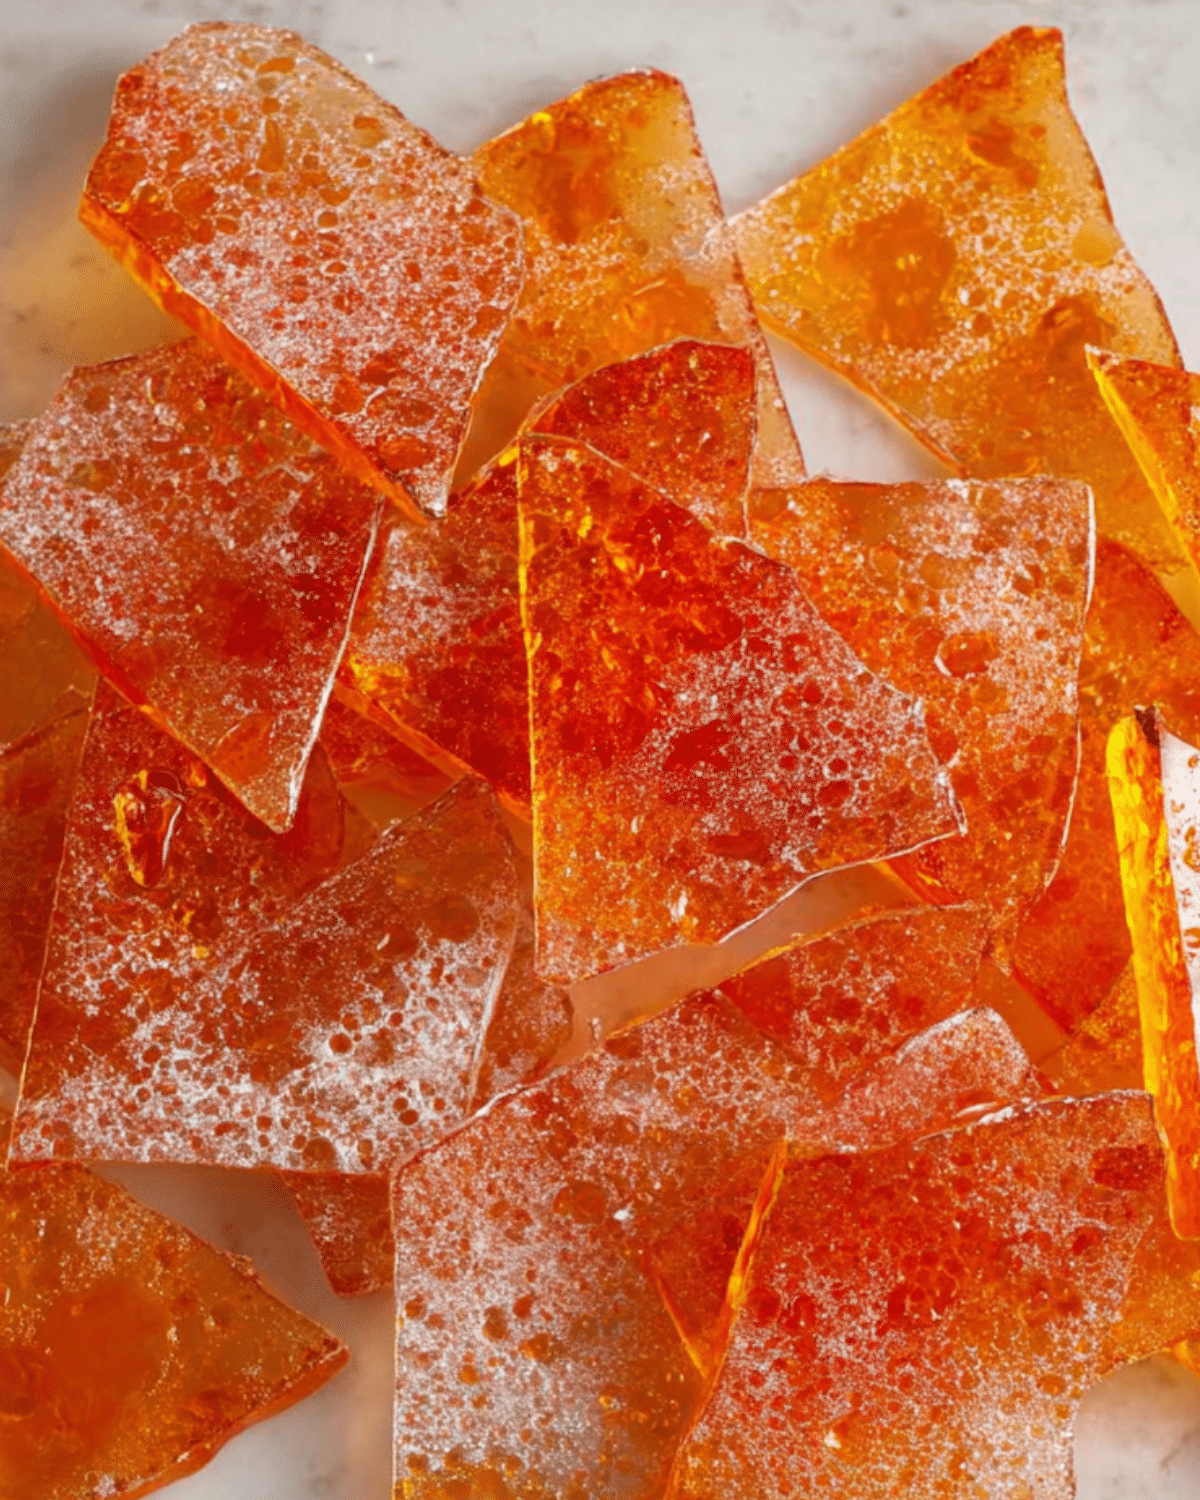
What Is Hard Tack Candy?
Hard Tack Candy is a traditional sugar candy made by boiling sugar, corn syrup, and water until the mixture reaches the hard crack stage. Once the candy reaches the correct temperature, flavored extracts and food coloring are added before pouring the hot syrup into prepared pans to cool.
After hardening, the candy is broken into small irregular pieces and dusted with powdered sugar to prevent sticking.
Its crunchy texture and bright colors have made it a holiday favorite for generations.
Ingredients

Candy Base
- 2 cups granulated sugar
- 2/3 cup light corn syrup
- 3/4 cup water
Flavoring
- 1 teaspoon flavored candy oil or extract (peppermint, cinnamon, cherry, lemon, orange, watermelon, raspberry, or wintergreen)
Color
- Food coloring of choice
Coating
- Powdered sugar
Ingredient Tips
Use candy flavoring oils whenever possible because they provide stronger flavor than standard baking extracts.
Gel food coloring creates vibrant colors without thinning the candy mixture.
Always use fresh granulated sugar for the clearest candy.
Kitchen Equipment
Making hard candy requires only a few tools.
- Heavy-bottom saucepan
- Candy thermometer
- Wooden spoon
- Measuring cups
- Measuring spoons
- Baking sheet or heatproof pan
- Parchment paper or silicone baking mat
- Pizza cutter or mallet
- Airtight storage container
How to Make Hard Tack Candy Easy Recipe
Step 1: Prepare Your Pan
Line a baking sheet or heatproof pan with parchment paper or a silicone baking mat.
Lightly dust the surface with powdered sugar if desired.
Step 2: Combine the Ingredients
Add the granulated sugar, corn syrup, and water to a heavy saucepan.
Stir gently until the sugar begins to dissolve.
Step 3: Heat the Candy
Place the saucepan over medium-high heat.
Continue cooking without stirring once the mixture begins boiling.
Attach a candy thermometer to the side of the pan.
Allow the syrup to reach 300°F (149°C), known as the hard crack stage.
Step 4: Add Flavor and Color
Remove the saucepan from the heat immediately.
Carefully stir in the flavored extract or candy oil.
Add several drops of food coloring and mix until evenly combined.
Work quickly because the candy begins hardening almost immediately.
Step 5: Pour the Candy
Carefully pour the hot syrup onto the prepared baking sheet.
Allow it to spread naturally.
Avoid touching the hot candy.
Step 6: Cool Completely
Leave the candy undisturbed until completely hardened.
Cooling usually takes about 30 to 45 minutes.
Step 7: Break Into Pieces
Use a clean kitchen mallet, rolling pin, or the back of a heavy spoon to break the candy into bite-sized pieces.
Dust with powdered sugar to prevent sticking.
Expert Tips for Perfect Hard Tack Candy
Always Use a Candy Thermometer
Reaching exactly 300°F is essential for achieving the proper crunchy texture.
Avoid Stirring After Boiling
Stirring once the mixture begins boiling can encourage sugar crystals to form.
Work Quickly
Flavoring and coloring should be added immediately after removing the syrup from the heat.
Choose Oil-Based Flavorings
Candy oils produce stronger flavor than standard extracts.
Store Properly
Humidity can make hard candy sticky, so always store it in airtight containers.
Best Flavor Ideas
One of the best things about this Hard Tack Candy Easy Recipe is the endless flavor possibilities.
Popular options include:
- Peppermint
- Cinnamon
- Cherry
- Lemon
- Orange
- Watermelon
- Raspberry
- Grape
- Green apple
- Wintergreen
- Cotton candy
- Bubble gum
You can even make several colorful batches for holiday candy trays.
Fun Color Combinations
Coordinate colors with your chosen flavors.
| Flavor | Color |
|---|---|
| Cherry | Red |
| Lemon | Yellow |
| Orange | Orange |
| Watermelon | Pink |
| Raspberry | Purple |
| Peppermint | Red and white |
| Green Apple | Green |
| Blue Raspberry | Blue |
Creative Serving Ideas
Hard Tack Candy isn’t just for eating straight from the candy jar.
Use it for:
- Holiday candy platters
- Homemade gift bags
- Dessert tables
- Party favors
- Cookie trays
- Candy buffets
- Decorative jars
- Stocking stuffers
Storage Tips
Store the candy in an airtight container at room temperature.
Separate layers with powdered sugar or wax paper.
Keep away from heat and humidity.
Properly stored candy remains fresh for several weeks.
Common Mistakes to Avoid
Guessing the Temperature
Always use a candy thermometer.
Overcooking
Candy cooked above 300°F may taste burnt.
Undercooking
Candy below the hard crack stage will remain sticky.
Working Too Slowly
The syrup hardens quickly after leaving the heat.
Storing in Humid Conditions
Moisture causes candy to become sticky.
Nutritional Information
Hard Tack Candy is a classic sugary confection designed as an occasional treat. Because it’s made primarily from sugar and corn syrup, it’s naturally high in carbohydrates and contains very little fat or protein. Enjoy it in moderation as part of a balanced diet.
Frequently Asked Questions
Why is my candy sticky?
Humidity or undercooking are the most common causes.
Can I use regular food coloring?
Yes, although gel coloring usually produces brighter colors.
Can I make multiple flavors?
Absolutely. Prepare separate batches using different extracts.
Can children help?
Children can help package the candy, but adults should handle the hot sugar mixture because it reaches extremely high temperatures.
Conclusion
This Hard Tack Candy Easy Recipe is a timeless homemade treat that’s as fun to make as it is to share. With its bright colors, endless flavor combinations, and satisfying crunch, it’s perfect for holidays, gifts, parties, or simply enjoying a nostalgic candy at home. Once you master the simple candy-making process, you’ll love experimenting with new flavors and creating beautiful homemade batches for family and friends.
PrintHard Tack Candy Easy Recipe: Classic Homemade Old-Fashioned Candy

This Hard Tack Candy Easy Recipe makes colorful, crunchy homemade hard candy using simple pantry ingredients. Perfect for holidays, homemade gifts, party favors, or satisfying your sweet tooth with classic old-fashioned flavor.
- Prep Time: 10 minutes
- Cook Time: 20 minutes
- Total Time: 30 minutes
- Yield: 2 pounds 1x
- Category: Candy
Ingredients
- 2 cups granulated sugar
- 2/3 cup light corn syrup
- 3/4 cup water
- 1 teaspoon flavored candy oil or extract (peppermint, cinnamon, cherry, lemon, orange, raspberry, watermelon, etc.)
- Food coloring of choice
- Powdered sugar for coating
Instructions
- Line a baking sheet or heatproof pan with parchment paper or a silicone baking mat.
- Combine the sugar, corn syrup, and water in a heavy-bottom saucepan.
- Cook over medium-high heat until the mixture reaches 300°F (149°C) on a candy thermometer without stirring after it begins boiling.
- Remove from the heat and immediately stir in the candy flavoring and food coloring.
- Carefully pour the hot candy mixture onto the prepared pan.
- Allow the candy to cool completely until hardened.
- Break the candy into bite-sized pieces using a mallet or the back of a heavy spoon.
- Dust with powdered sugar to prevent sticking and store in an airtight container.
Notes
- Always use a candy thermometer for accurate results.
- Do not stir the candy once it starts boiling.
- Work quickly after adding flavoring and coloring.
- Store in a cool, dry place away from humidity.
- Separate layers with powdered sugar or wax paper.
- Keep children away from the hot sugar mixture.
Nutrition
- Serving Size: 1 piece
- Calories: 55
- Sugar: 14g
- Sodium: 2mg
- Fat: 0g
- Saturated Fat: 0g
- Unsaturated Fat: 0g
- Trans Fat: 0g
- Carbohydrates: 14g
- Fiber: 0g
- Protein: 0g
- Cholesterol: 0mg